Last updated on November 22, 2026
There is a dessert I order in every restaurant I visit, and it is always the same one: the chocolate lava cake. Not the cake, not the mousse — the lava cake, the small dark dome that arrives warm on a white plate, and when the spoon goes in, the centre pours out like liquid chocolate. For years I assumed that moment came from a professional kitchen with equipment I did not own, because every lava cake recipe I read started with the same intimidating idea: you have to bake a cake deliberately underdone, on purpose, and get it exactly right. I tried it once in my early baking days. I baked it like a normal cake, for a normal cake amount of time, and what came out was a perfectly nice chocolate cupcake with no lava at all. I tried it again, guessed the other way, and what came out was a puddle that collapsed the moment I turned the ramekin over. Then I learned the secret this chocolate lava cake recipe is built on: a lava cake is not a failed cake. It is a cake baked deliberately underdone, and the whole dessert is a temperature gap. The outside reaches about 175–180°F and sets, while the centre stays around 140°F and stays liquid. That gap is the recipe. Get the timing right and the lava flows every single time. This is the version I make at home now — six pantry ingredients, four ramekins, 27 minutes from the first chop of chocolate to the first spoonful, and a centre that flows like the restaurant version, made in my own kitchen.
If you have only ever eaten lava cake in a restaurant, this recipe will surprise you twice. First, by how fast it is — this is the quickest recipe in the whole Chocolacious collection, and the only one that is a weeknight dessert rather than a make-ahead one. There is no overnight chill, no water bath, no waiting. You mix the batter while the oven heats, you bake for 12 minutes, and you eat it within minutes of it coming out of the oven. Second, by how much of the dessert is timing and how little of it is technique. If you can melt chocolate, beat eggs and watch a clock, you can make this. It is the same melted chocolate you already know from our chocolate ganache recipe — folded into an egg batter instead of poured over a cake — and it is finished the same way, with powdered sugar and a scoop of vanilla ice cream, so the whole dessert is chocolate from the first spoonful to the last. And once you have made it once, you will understand why this is the recipe people ask for at every dinner party and date night.
Table of Contents
- Why This Recipe Works
- Ingredients
- How to Make Chocolate Lava Cake
- The Timing Guide
- Pro Tips and Troubleshooting
- Variations
- How to Serve and Store
- Frequently Asked Questions
- Nutrition
- More Recipes You Will Love
Why This Recipe Works
A lava cake is not a cake that went wrong. It is a cake that was baked deliberately underdone, and the reason it works is a temperature gap. In a 425°F oven, the outside of the batter heats fast: the edges reach roughly 175–180°F, the egg proteins there set, the flour firms up, and a wall forms. The centre heats more slowly, because heat has to travel through that wall, and by the time the outside is set, the centre is only around 140°F — warm enough to be liquid chocolate, cool enough that the eggs in it have not set. That is the whole dessert. The wall holds the shape, the centre stays molten, and the spoon breaks the wall and lets the lava out. Everything in this recipe exists to protect that gap: the high heat, the short time, the small ramekins, and the one-minute rest.
The second thing that makes this recipe work is the eggs — and not just the eggs, the yolks. The recipe uses two whole eggs and two extra yolks, and that is not a garnish, it is the method. Whole eggs give the batter its structure and its lift, but yolks are almost pure fat and emulsifier, and they are what make the centre rich and fluid instead of cakey. A lava cake made with whole eggs alone sets firmer and tastes more like a cupcake; the extra yolks keep the centre glossy and flowing even as the walls set around it. The third thing is the tiny amount of flour — just two tablespoons for four cakes. Two tablespoons is only a scaffold, enough starch to build the walls and hold the shape through the invert. Add more flour and the centre has something to set against, and the lava cake becomes a cupcake. Keep the flour at two tablespoons and the centre has nothing to hold it, so it stays liquid. The last thing is the ramekin prep: buttering the ramekins and dusting them with cocoa powder is what lets the cake release cleanly for the invert. Skip it, and the cake sticks, the wall tears, and the lava leaks out in the ramekin instead of on the plate.
And the timing is not garnish either. Sixty to ninety seconds too long in the oven and the centre passes 160°F, the eggs in it set, and the lava is gone — the cake is still delicious, but it is a chocolate cake, not a lava cake. Sixty seconds too short and the walls have not set enough to hold the invert, and the cake collapses on the plate. The 12 to 14 minute window in this recipe is the window where the walls are firm and the centre is still liquid, and the timing guide below shows exactly how to read it, because the clock is only half the story — your eyes are the other half.
Ingredients
Eight ingredients go into the batter, plus softened butter and cocoa powder to prep the ramekins. That is the whole list, and there is nothing to hide behind, which is why the chocolate matters more here than in almost any other recipe on this site. The chocolate IS the centre — it is the lava — so buy the best semi-sweet chocolate you can find, 60 to 70% cocoa, a bar you would happily eat on its own. Chocolate chips work, but a chopped bar melts more smoothly and tastes better, because bars are made to melt and chips are made to hold their shape. If you would not eat the chocolate on its own, do not bake with it here.
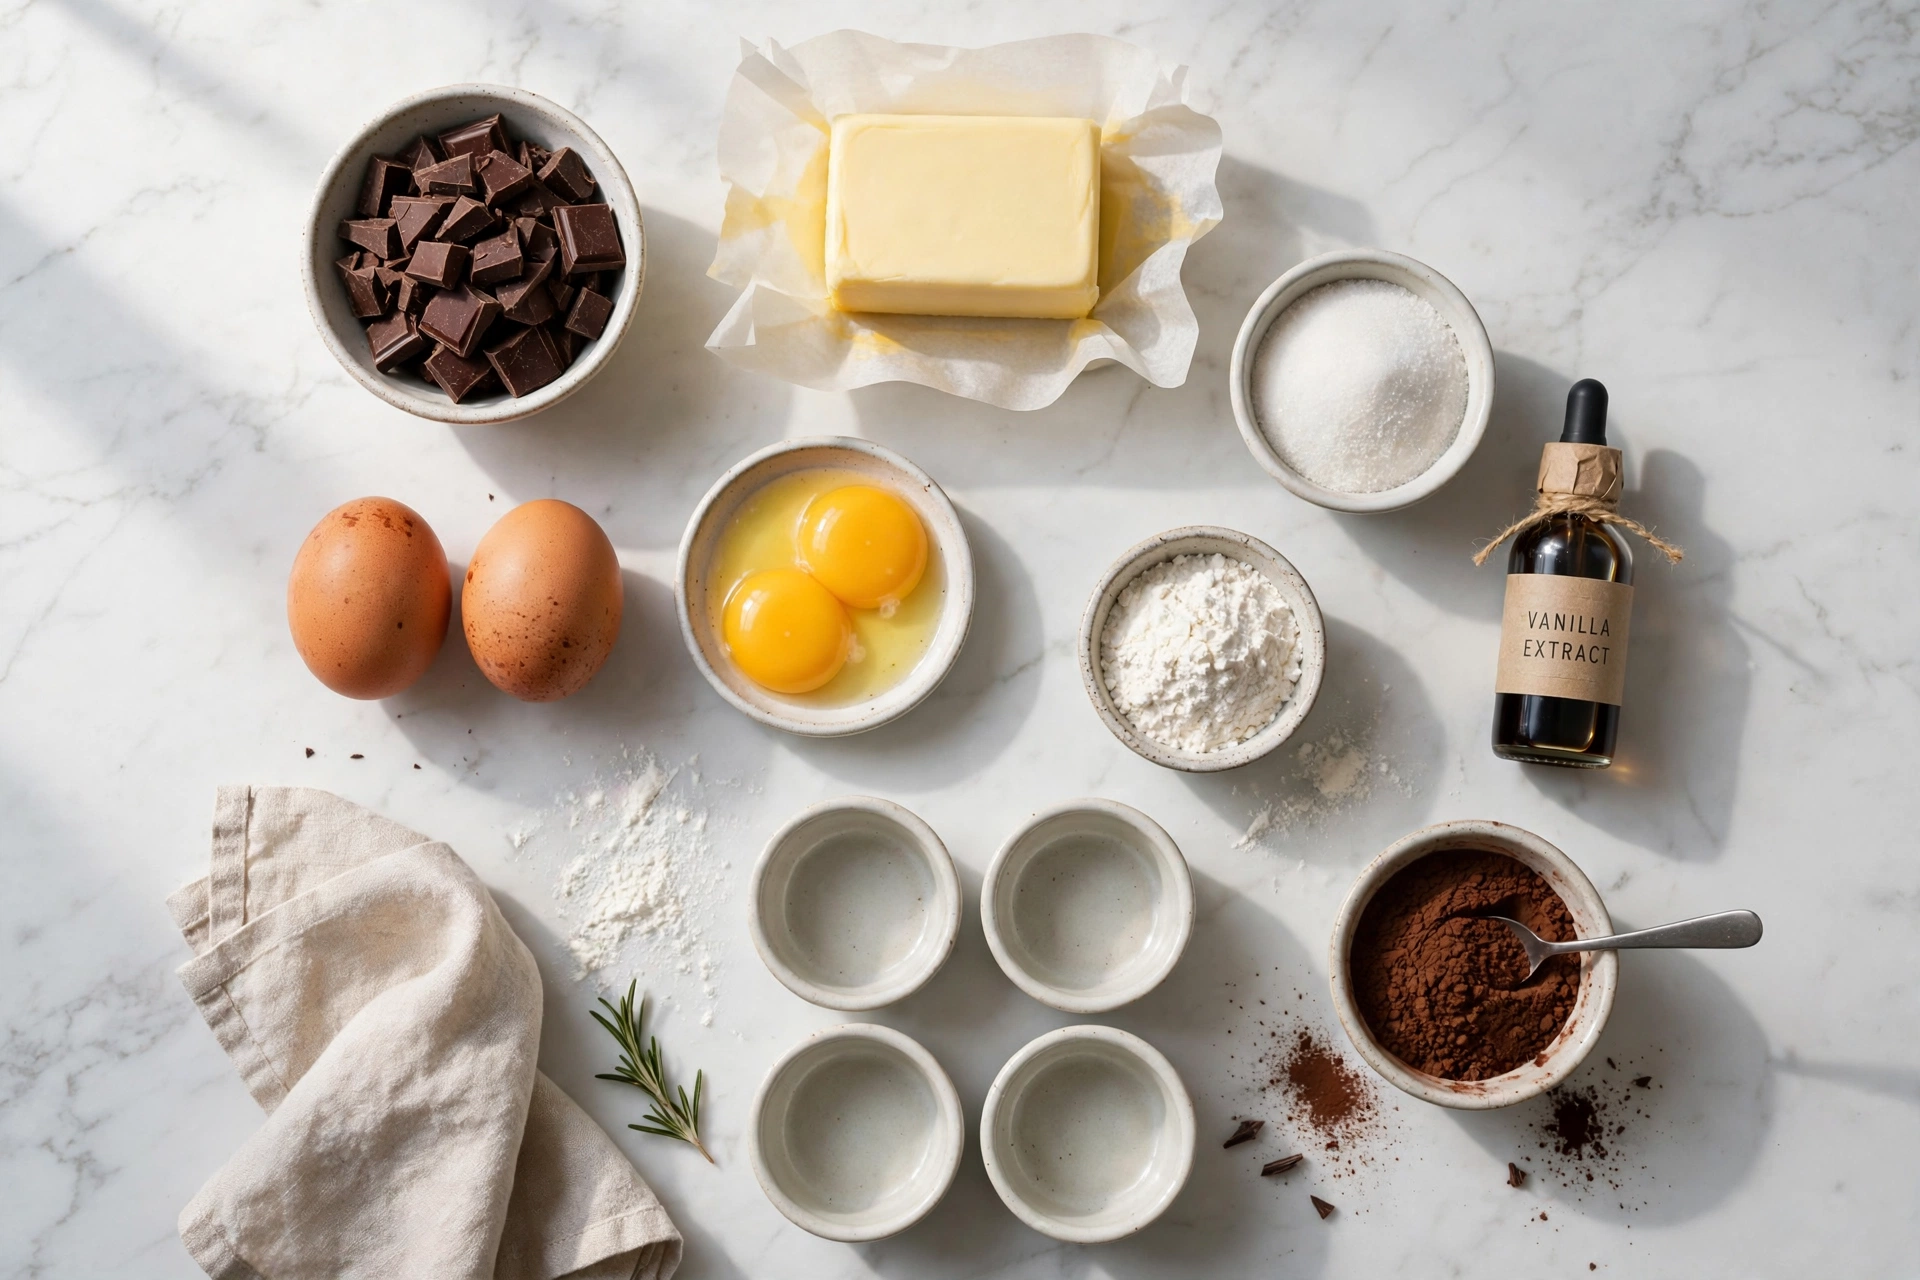
- 6 oz (170 g) semi-sweet chocolate, chopped — 60 to 70% cocoa, a bar, not chips if you can manage it. This is the lava, so it has to be chocolate you love.
- 1/2 cup (113 g) unsalted butter — plus a little extra softened butter for greasing the ramekins. Unsalted, so the salt in the recipe stays in your control.
- 2 large whole eggs, room temperature — take them out of the fridge at least 30 minutes before you start. Cold eggs do not beat up pale and thick the way the recipe needs.
- 2 large egg yolks, room temperature — the extra yolks are what keep the centre rich and fluid instead of cakey. Save the whites for meringues or an omelette.
- 1/4 cup (50 g) granulated sugar — just enough to sweeten and to help the eggs whip up pale. The chocolate brings most of the sweetness.
- 1/8 teaspoon salt — a small pinch, but do not skip it. Salt is what makes the chocolate taste like chocolate instead of just sweet.
- 1 teaspoon vanilla extract — pure vanilla, not imitation. It rounds out the chocolate and softens the edge of the cocoa.
- 2 tablespoons all-purpose flour — spooned and levelled. Two tablespoons is the whole scaffold: enough to build the walls, not enough to set the centre.
For the ramekins: softened butter for greasing, and about a tablespoon of cocoa powder for dusting. The cocoa does two jobs at once: it stops the cake sticking, and because it is cocoa rather than flour, it does not leave a pale, floury coat on the outside of the finished cake. Use four 6-ounce ceramic ramekins — the bake time in this recipe is written for 6-ounce ramekins only, and the timing guide below explains what changes if yours are a different size.
A note on the eggs: the centre of a lava cake stays around 140°F, which is below the temperature that fully sets an egg. That is the point of the dessert, and it is also why the recipe calls for fresh eggs from a source you trust. If anyone at the table is pregnant, very young, elderly, or immunocompromised, bake their cake 1 to 2 minutes longer and accept a softer, less runny centre — it will still be delicious, and it will be fully set all the way through.
How to Make Chocolate Lava Cake
Ten steps, and the whole thing takes about 27 minutes. Read the timing guide below before you start — the bake is the recipe, and knowing what to look for at 11 minutes is the difference between lava and cupcake. Have your plates ready before the cakes go in the oven, because once they come out, everything moves fast.
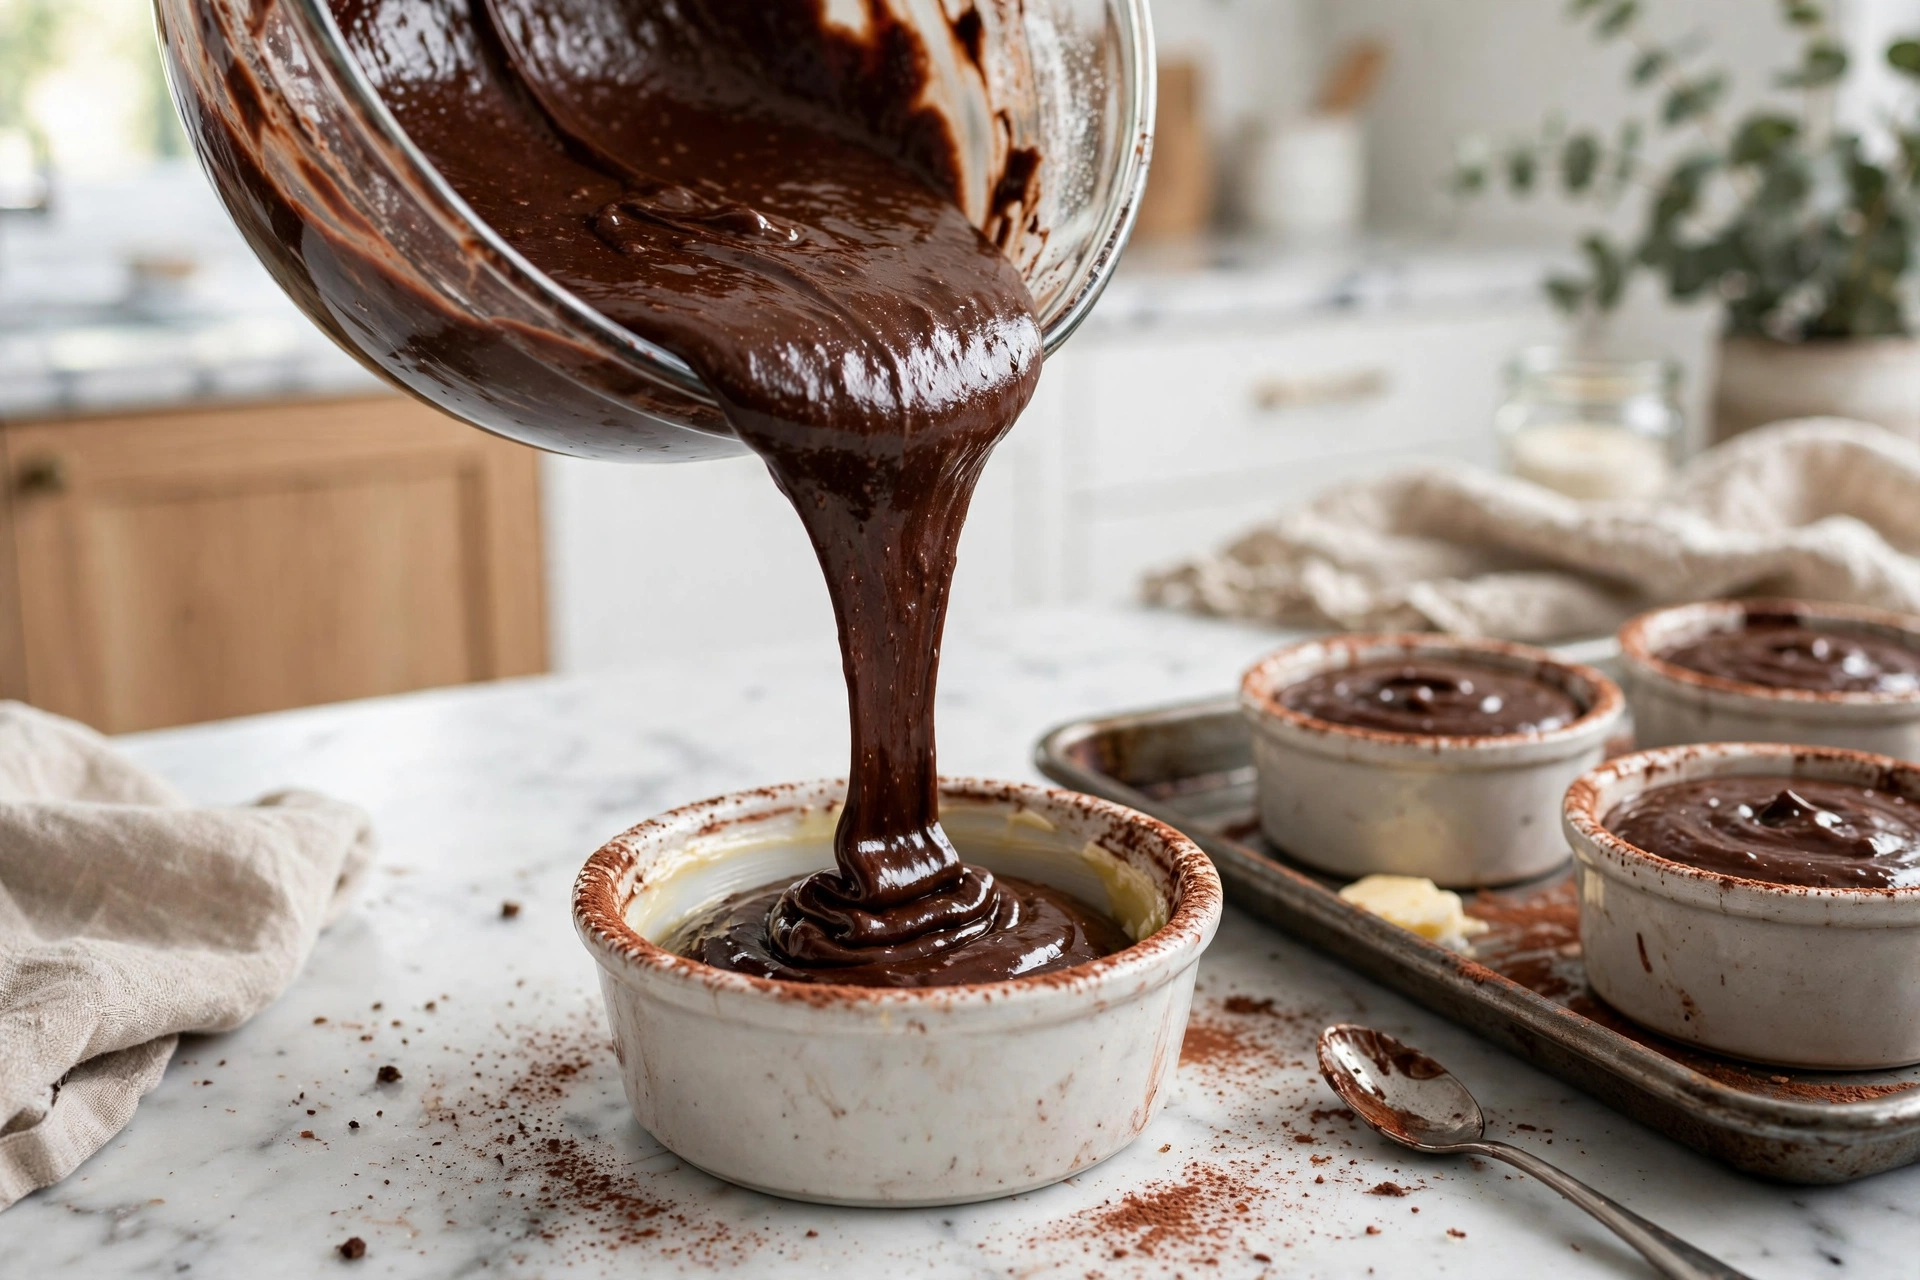
- Preheat and prep the ramekins. Heat the oven to 425°F (220°C) with a rack in the middle. Generously butter four 6-ounce ceramic ramekins, getting into every curve, then dust each one with cocoa powder — tap it around until the inside is coated, then tap the excess out. Set the ramekins on a rimmed baking sheet. The baking sheet is not optional: it is how you move four hot ramekins in and out of the oven without burning yourself, and it catches any batter that bubbles over.
- Melt the chocolate and butter. Put the chopped chocolate and the butter in a heatproof bowl. Melt them together gently — in the microwave in 30-second bursts, stirring between each one, or over a pan of barely simmering water — until smooth and glossy. Do not let the chocolate get hot; warm and fluid is what you want. Let it cool for 2 to 3 minutes while you beat the eggs, so it is warm, not hot, when it meets them.
- Beat the eggs, yolks, sugar and salt. In a medium bowl, beat the two whole eggs, the two yolks, the sugar and the salt with a hand mixer or a whisk until pale, slightly thickened and a little foamy — about 2 to 3 minutes with a mixer, a minute longer by hand. The mixture should fall from the beaters in a ribbon that sits on the surface for a second before sinking back in. This is the lift in the recipe, and it is also what holds the walls up.
- Fold in the chocolate and vanilla. Pour the warm chocolate and butter mixture into the beaten eggs, add the vanilla, and fold gently with a spatula until the batter is one even dark colour. Fold, do not whisk: whisking beats air in, and air is what makes the walls puff and then collapse. Slow, wide strokes, scraping the bottom of the bowl, until there are no streaks left.
- Fold in the flour. Sprinkle the two tablespoons of flour over the batter and fold just until it disappears. Stop the moment you cannot see flour any more. Over-mixing now is what turns a lava cake into a cupcake, because it develops the gluten that sets the centre.
- Fill the ramekins. Divide the batter evenly among the four prepared ramekins, filling each one about three-quarters full. Do not fill them to the brim — the batter rises as it bakes, and a ramekin filled to the top will overflow and glue itself to the baking sheet. Wipe any drips off the rims, because batter on the rim bakes on and sticks.
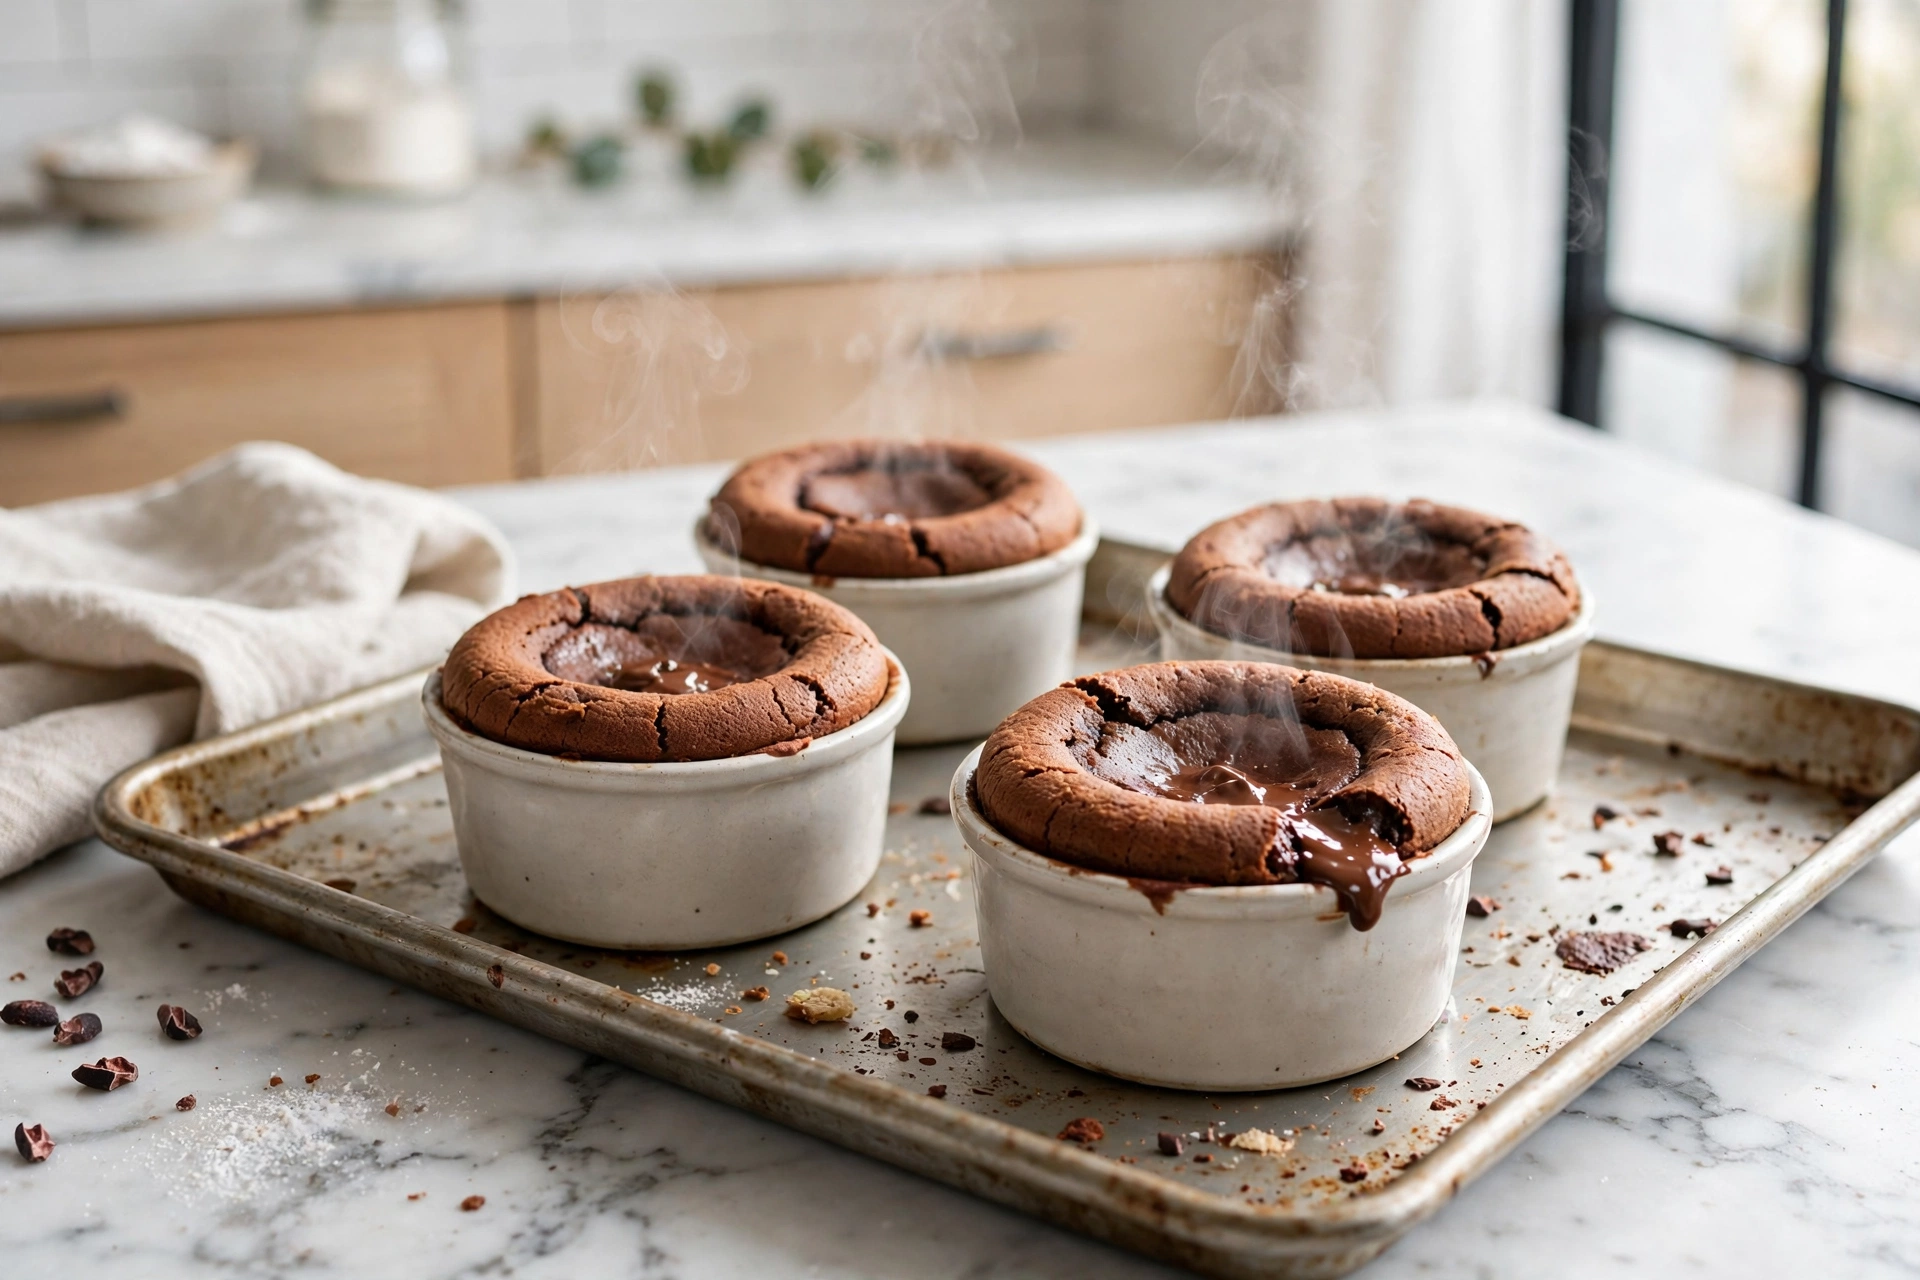
- Bake 12 to 14 minutes. Slide the baking sheet into the oven and bake until the edges are firm, puffed and matte, and the centre — about a quarter-sized circle — still wobbles gently when you shake the sheet. Start checking at 11 minutes. The cakes are done when the edges look set and the centre looks soft and slightly sunken, not wet and shiny. Do not wait for the centre to look done, because by then it is over-baked.
- Rest exactly 1 minute. Take the sheet out of the oven and leave the cakes exactly 1 minute — no more. In that minute the walls firm up just enough to hold their shape through the invert, while the centre stays molten. Rest them for 5 minutes and the cake sets in the ramekin and will not come out cleanly; invert them straight out of the oven and the walls are too soft and the cake collapses.
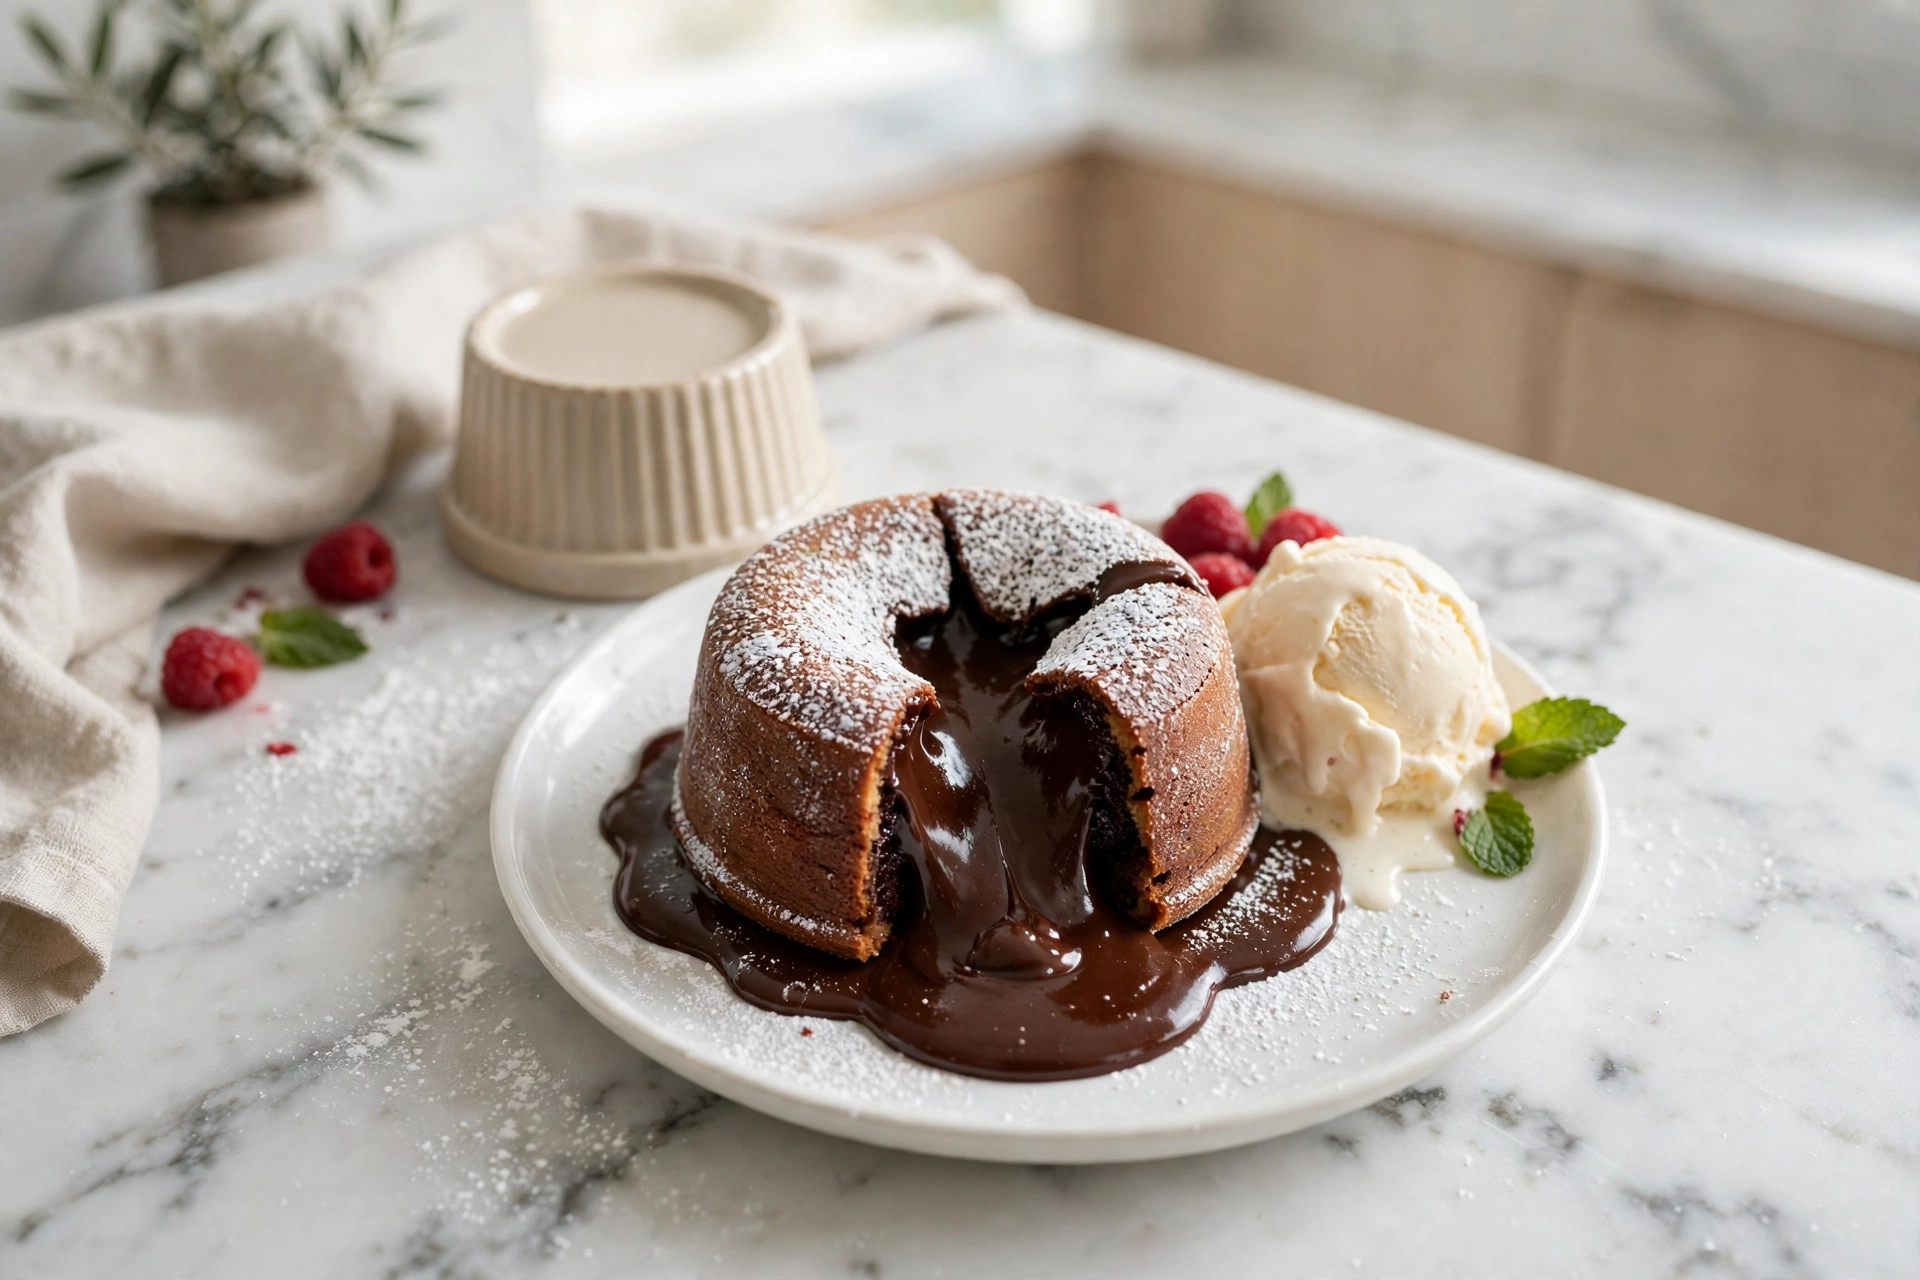
- Invert onto plates. Run a thin knife around the inside edge of each ramekin, place a dessert plate upside down over the top, and flip the two together in one confident motion. Hold the ramekin in place for 10 to 20 seconds, then lift it straight off. If a cake resists, give the ramekin a gentle shake — do not pry it with the knife, or you will tear the wall and the lava will leak out before it reaches the plate.
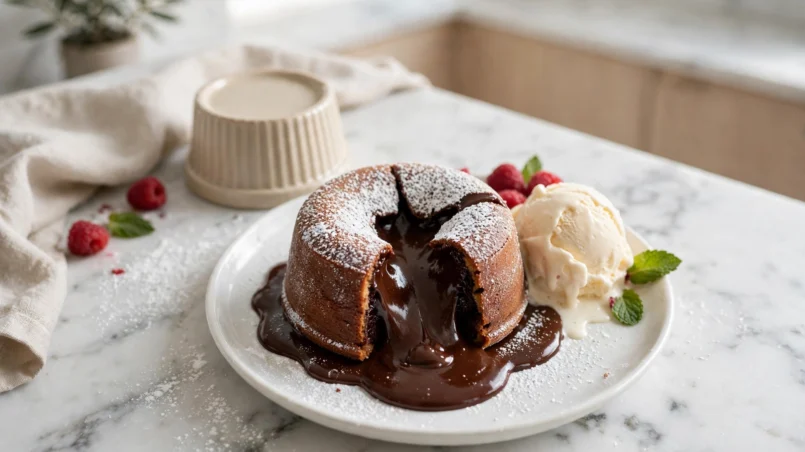
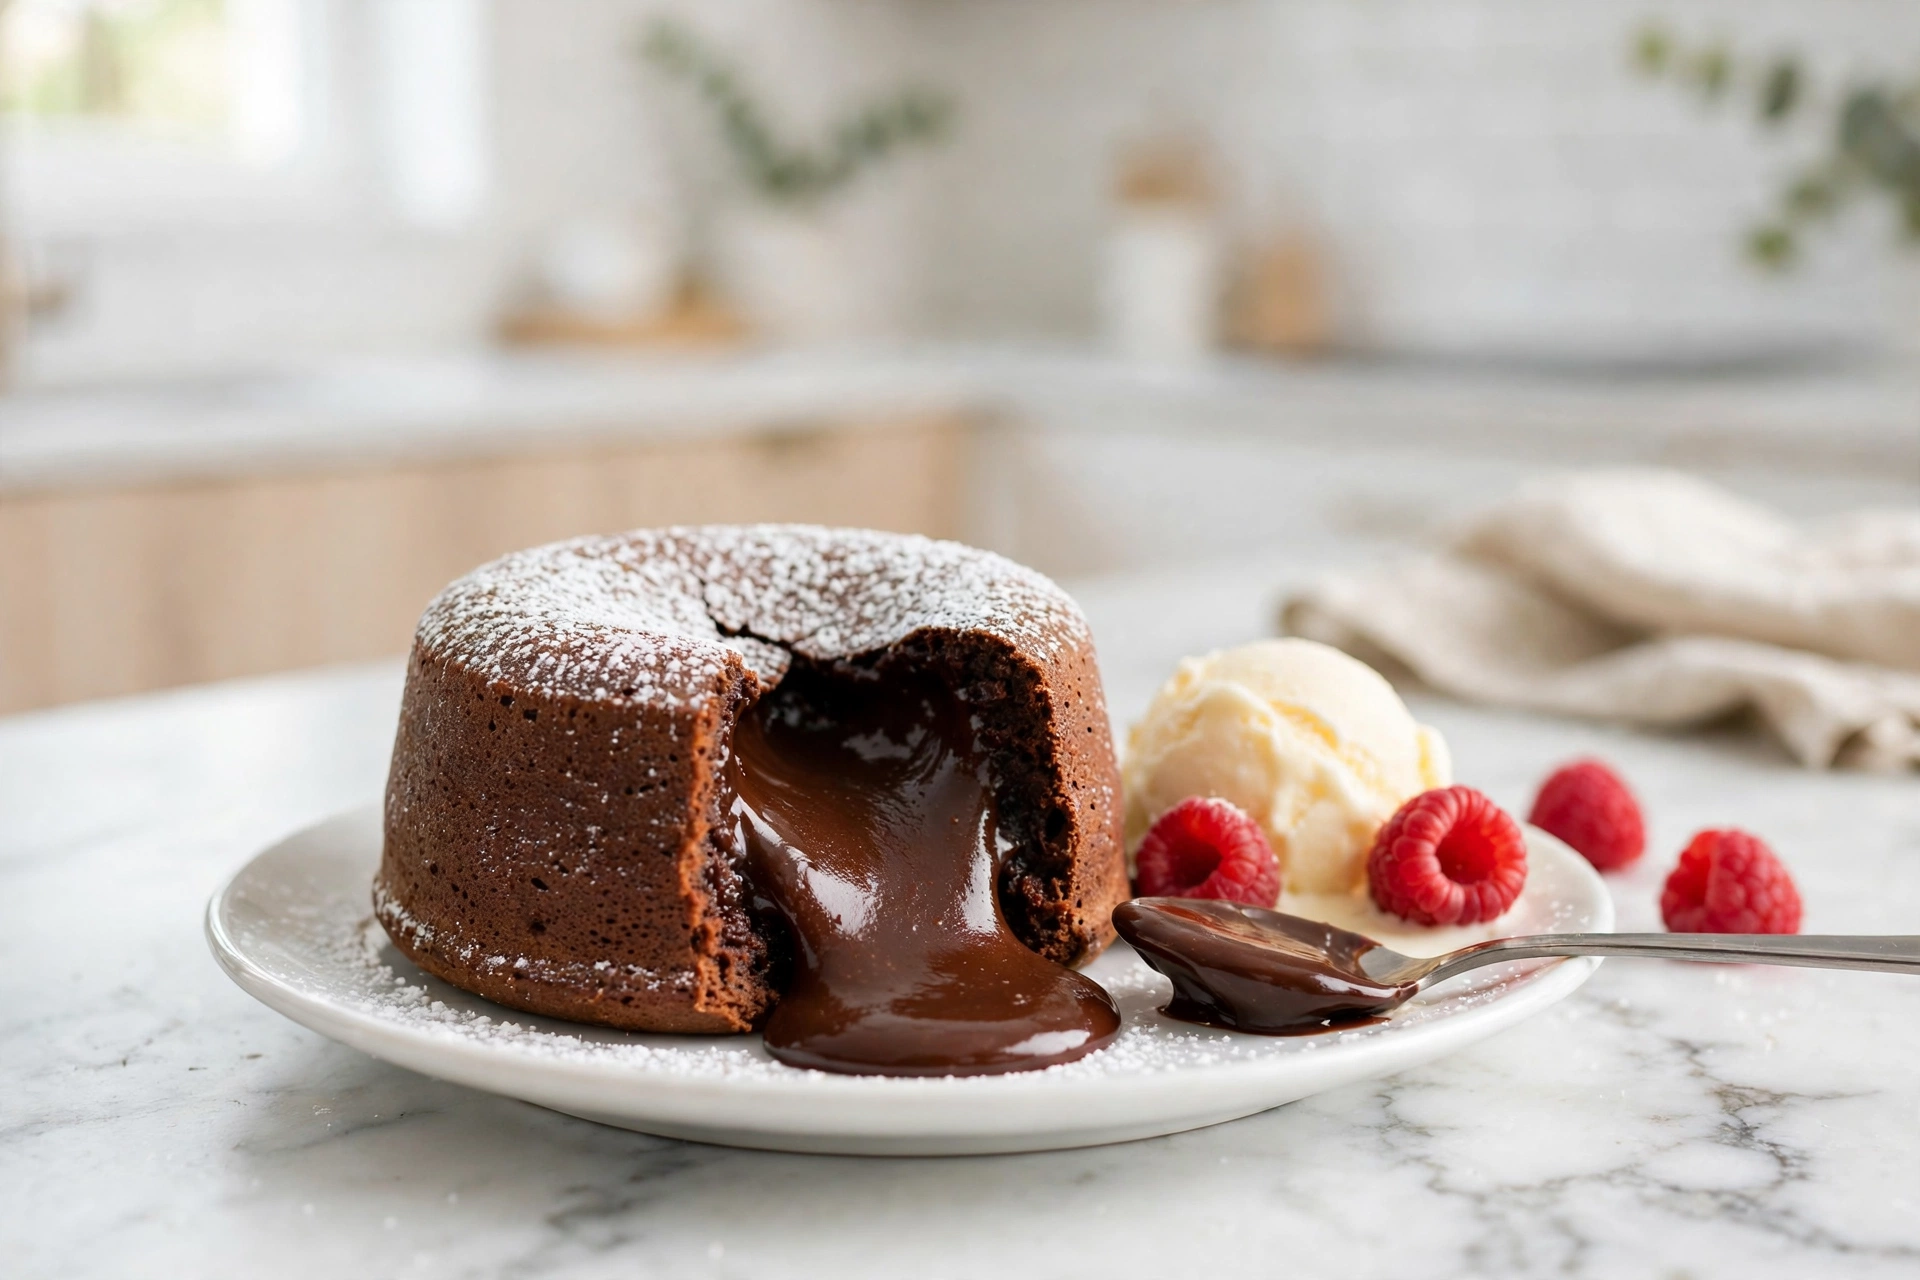
- Dust and serve at once. Dust the tops with powdered sugar, add a scoop of vanilla ice cream and a few berries if you like, and serve immediately — within minutes of the oven. A lava cake does not wait. The centre sets as it cools, so the moment to eat it is now.
The Timing Guide
The bake time is the entire recipe, so here it is as a table. The 12 to 14 minute window is written for 6-ounce ramekins in a true 425°F oven — and the table shows what changes when your ramekins or your oven are different, because bake time scales with ramekin size and no single number works for every dish.
| Ramekin Size | Bake Time at 425°F | What to Look For |
|---|---|---|
| 4-ounce ramekins | 9–11 minutes | Smaller cakes set faster — start checking at 8 minutes, and expect a thinner wall and a smaller lava pool |
| 6-ounce ramekins (this recipe) | 12–14 minutes | Edges firm, puffed and matte; centre wobbles gently like a quarter-sized circle |
| 8-ounce ramekins | 14–16 minutes | The extra batter needs longer for the walls to set — check at 13 minutes, not before |
| 10-ounce ramekin (single serve) | 13–15 minutes | One big cake for one person — the centre stays softer for longer, so judge by the wobble, not the clock |
| Jumbo muffin tin | 10–12 minutes | Well-buttered cups, smaller portions bake faster — check at 9 minutes and invert carefully, as the cups are shallower |
The wobble test: this is the skill the recipe turns on, and it is a visual one. At 11 minutes, open the oven and gently shake the baking sheet. The edges of each cake should be firm and matte, risen slightly above the rim of the ramekin, and the centre — a circle about the size of a quarter — should wobble like jelly. That wobble is correct. It is the liquid centre moving under a thin, just-set skin, and it is exactly what you want. If the whole surface ripples, give it another minute and check again. If the centre is flat, firm and matte all the way across, it is already over-baked — take it out anyway, because another minute will only make it worse, and serve it as a warm chocolate cake with ice cream. Nobody at the table will complain.
The 60 to 90 second cliff: the reason the window is so narrow is that the centre passes from liquid to set in about a minute. At 140°F the centre is molten; at 160°F the eggs in it begin to set; at 175°F it is cake all the way through. In a 425°F oven, the centre climbs through that range in roughly 60 to 90 seconds, which is why the recipe says to start checking at 11 minutes and to pull the cakes the moment the edges are set. Thick stoneware ramekins hold more heat than thin ceramic ones, so if yours are heavy and thick-walled, expect to add about 60 seconds to the bake — and check by the wobble, not by the clock, because your oven and your ramekins are not the same as mine. An oven thermometer is worth the few dollars here: a dial that says 425°F and means 400°F will under-bake every cake, and a dial that means 450°F will set the centre before the walls are ready.
Pro Tips and Troubleshooting
Most lava cake problems have one of six causes, and all six are easy to fix — or to avoid entirely. Here they are, with the fix for each:
- No lava flow: over-baked by even a minute. The centre passed 160°F and the eggs in it set, so the cake is delicious but solid. The fix is in the timing guide: start checking at 11 minutes, pull the cakes the moment the edges are firm and the centre still wobbles, and remember the 60 to 90 second cliff. Next time, set a timer for 11 minutes, not 14, and trust the wobble test over the clock.
- Stuck in the ramekin: under-buttered, or rested too long before inverting. Butter every curve of the ramekin generously and dust it with cocoa powder so the whole inside is coated — a missed patch is a stuck patch. And invert at 1 minute, not 5: after 5 minutes the cake has set in the ramekin and will not come out cleanly. If one does stick, run a thin knife around the edge, give the ramekin a gentle shake, and serve it in the ramekin with a spoon — it still tastes wonderful.
- Collapsed after inverting: under-baked walls. The edges must look firm and matte, not wet and shiny, before the cake comes out of the oven. If the edges are still wet, the walls have not set enough to hold the invert, and the cake slumps the moment the ramekin lifts. Give it another minute in the oven and check again — and remember that a collapsed lava cake is still a warm chocolate cake with a molten centre, so serve it with ice cream and nobody will mind.
- Dry and cakey throughout: too much flour, or the oven too cool for too long. Two tablespoons of flour is the whole recipe — spoon it and level it, and do not heap it. And check your oven temperature: a cool oven bakes the cake slowly, so the centre has time to set before the walls are ready, and the whole thing comes out dry. An oven thermometer settles this in one bake.
- Centre set but edges raw: the ramekins are too large for the amount of batter. Four 6-ounce ramekins is the recipe — if you use 8 or 10-ounce ramekins with the same amount of batter, the batter sits too shallow, the edges never get the depth they need, and the timing falls apart. Either use 6-ounce ramekins as written, or scale the batter up and use the timing table above for the larger size.
- Grainy centre: the chocolate seized from water or overheated. Keep water out of the chocolate entirely — even a few drops from a wet bowl will make it seize into a grainy paste — and melt it gently, in 30-second bursts, stirring between each one. If it does seize, stir in a tablespoon of warm cream and keep stirring until it smooths out again; it usually recovers.
Two more tips worth knowing: weigh the chocolate and the butter — grams are where the balance stops slipping, and a kitchen scale is the cheapest insurance this recipe has, because the ratio of chocolate to flour is what keeps the centre liquid. And warm your plates before you invert. A cold plate steals heat from the cake the moment it lands, and the centre starts setting on contact — a plate warmed for a minute in a low oven keeps the lava flowing for the few minutes it takes to get to the table.
Variations
Once the base recipe works, it takes variations happily — five of them, all tested against the same timing, so the bake time does not change:
- Espresso lava: stir 1 teaspoon of instant coffee into the melted chocolate and butter. It does not make the cake taste like coffee — it makes the chocolate taste more like chocolate, the way espresso powder does in our chocolate cheesecake recipe. Use instant coffee, not brewed coffee, or the extra liquid will thin the batter.
- Salted caramel centre: drop a frozen caramel cube into the centre of each filled ramekin before baking. It melts into a second, saltier lava inside the chocolate one. Freeze the caramel first — a soft caramel dissolves into the batter and disappears — and keep it small, about a teaspoon, or it will overwhelm the chocolate.
- White chocolate lava: swap the semi-sweet chocolate for white chocolate and cut the sugar to 2 tablespoons, because white chocolate is much sweeter. Expect a softer set and a paler, creamier centre — white chocolate has no cocoa solids, so the walls are more delicate, and you should pull the cakes a minute earlier than the base recipe.
- Gluten-free: swap the same 2 tablespoons of flour for a 1:1 gluten-free flour blend. Nothing else changes — the flour is only a scaffold here, and a 1:1 blend builds it just as well. Do not use a single-flour substitute like almond flour on its own, or the walls will be too soft to hold the invert.
- Single-serve: make the whole recipe in one 10-ounce ramekin and bake 13 to 15 minutes, judging by the wobble, not the clock. It is the same batter, the same method, and the same lava — just one big cake for one person, which is exactly how a lava cake should be eaten when nobody else is home.
Serving: vanilla ice cream, fresh raspberries, powdered sugar and whipped cream are the classics, and they are classics because the cold, the tart and the sweet all cut through the richness of the chocolate. If you want the same chocolate hit without the timing pressure, our chocolate fudge recipe is the make-ahead version of this flavour — and if you want the full-size version of this batter, our chocolate cake recipe bakes it as a whole cake. A mug of hot chocolate recipe alongside is the other half of the dinner-party version.
How to Serve and Store
Serve immediately, within minutes of the oven — a lava cake does not wait. The centre sets as it cools, so the window for the lava is short: plate it, dust it, and eat it while it is still warm. If you are serving four people, have everyone seated and the plates warmed before the cakes come out of the oven, because the cakes will not hold for a photograph, let alone a first course.
Baked cakes do not store. Once a lava cake has cooled, the centre has set, and reheating it will not bring the lava back — it will only bake the centre further. Do not try to save a baked lava cake for later. The batter, on the other hand, keeps beautifully: make it up to 24 hours ahead, divide it among the buttered and cocoa-dusted ramekins, cover them, and keep them in the fridge. Bake straight from cold, and add 1 to 2 minutes to the bake time, checking by the wobble as usual. That is the make-ahead version of this recipe, and it is how restaurants do it — batter ready in the fridge, baked to order, served within minutes.
Frequently Asked Questions
How do I know when my lava cake is done?
Use the wobble test. At 11 minutes, gently shake the baking sheet: the edges should be firm, puffed and matte, and the centre — a circle about the size of a quarter — should wobble gently like jelly. That wobble is correct, and it is the liquid centre moving under a thin, just-set skin. If the whole surface ripples, give it another minute and check again. If the centre is flat, firm and matte all the way across, it is already over-baked — take it out anyway and serve it as a warm chocolate cake with ice cream.
Why is there no lava in my lava cake?
It was over-baked — even 60 to 90 seconds too long is enough. The centre climbs from 140°F, where it is molten, to 160°F, where the eggs in it set, in about a minute in a 425°F oven, so the window is narrow. Start checking at 11 minutes, pull the cakes the moment the edges are firm and the centre still wobbles, and set a timer for 11 minutes rather than 14. The cake is still delicious — it is just a chocolate cake now, not a lava cake.
Can I make the batter ahead of time?
Yes — up to 24 hours ahead. Divide the batter among the buttered and cocoa-dusted ramekins, cover them, and keep them in the fridge. Bake straight from cold and add 1 to 2 minutes to the bake time, checking by the wobble as usual. Baked cakes do not hold, so always bake to order and serve within minutes of the oven.
Can I use a muffin tin instead of ramekins?
Yes — a jumbo muffin tin, well buttered and dusted with cocoa powder, works. The cups are shallower than ramekins, so the cakes bake faster: start checking at 9 minutes and expect 10 to 12 minutes in total. Invert them the same way, with a plate over the top, and be gentle — the shallower cups make a more delicate wall. Standard muffin cups are too small for this batter; use jumbo only.
Is it safe to eat with a liquid centre?
For most people, yes — the centre reaches around 140 to 160°F, and the recipe calls for fresh eggs from a source you trust. Anyone who is pregnant, very young, elderly, or immunocompromised should have their cake baked 1 to 2 minutes longer, which sets the centre fully while keeping it soft and warm. It will be a softer, less runny centre, but it will still be delicious.
Can I use milk chocolate instead of semi-sweet?
Yes, but cut the sugar to 2 tablespoons and expect a sweeter, softer set. Milk chocolate has more sugar and less cocoa than semi-sweet, so the centre will be sweeter and the walls will be more delicate — pull the cakes a minute earlier than the base recipe and judge by the wobble. Dark chocolate above 70% works the other way: richer and less sweet, and you may want to add an extra tablespoon of sugar.
Why did my lava cake stick to the ramekin?
Either the ramekin was under-buttered, or the cake rested too long before inverting. Butter every curve generously and dust with cocoa powder until the whole inside is coated — a missed patch is a stuck patch. And invert at 1 minute, not 5: after 5 minutes the cake has set in the ramekin and will not come out cleanly. If one does stick, run a thin knife around the edge, give the ramekin a gentle shake, and serve it in the ramekin with a spoon.
Nutrition (Per Serving, Approximate)
Calories: 540 | Carbohydrates: 42g | Protein: 7g | Fat: 44g | Sugar: 34g
Nutrition values are estimated for 1 of 4 lava cakes, and may vary based on exact ingredients used.
More Recipes You Will Love
| Recipe | Category |
|---|---|
| Chocolate Cheesecake Recipe | Chocolate Treats and Candy |
| Chocolate Fudge Recipe | Chocolate Treats and Candy |
| Chocolate Ganache Recipe | Chocolate Treats and Candy |
| Hot Chocolate Recipe | Chocolate Treats and Candy |
Chocolate Lava Cake Recipe
Ingredients
Method
- Preheat the oven to 425°F (220°C) with a rack in the middle. Generously butter four 6-ounce ceramic ramekins, dust each one with cocoa powder, and set them on a rimmed baking sheet.
- Melt the chopped chocolate and butter together gently — in the microwave in 30-second bursts, stirring between each one, or over a pan of barely simmering water — until smooth and glossy. Let cool for 2 to 3 minutes.
- Beat the two whole eggs, the two yolks, the sugar and the salt until pale, slightly thickened and a little foamy, about 2 to 3 minutes with a mixer.
- Pour the warm chocolate and butter mixture into the beaten eggs, add the vanilla, and fold gently with a spatula until the batter is one even dark colour.
- Sprinkle the flour over the batter and fold just until it disappears. Stop the moment you cannot see flour any more.
- Divide the batter evenly among the four prepared ramekins, filling each one about three-quarters full. Wipe any drips off the rims.
- Bake 12 to 14 minutes until the edges are firm, puffed and matte and the centre still wobbles gently when shaken; start checking at 11 minutes.
- Rest exactly 1 minute — no more. In that minute the walls firm up just enough to hold their shape through the invert, while the centre stays molten.
- Run a thin knife around the inside edge of each ramekin, place a dessert plate upside down over the top, and flip the two together in one confident motion. Hold the ramekin in place for 10 to 20 seconds, then lift it straight off.
- Dust with powdered sugar, add ice cream and berries if you like, and serve immediately — within minutes of the oven.
Notes
If you want the same chocolate served cold instead of warm and molten, try our chocolate ice cream recipe — creamy no-churn chocolate ice cream with just five ingredients and fifteen minutes of active work, no ice-cream maker and no custard to temper. It is the first frozen dessert in our chocolate collection, and the scoop to serve beside a warm lava cake.