Last updated on November 20, 2026
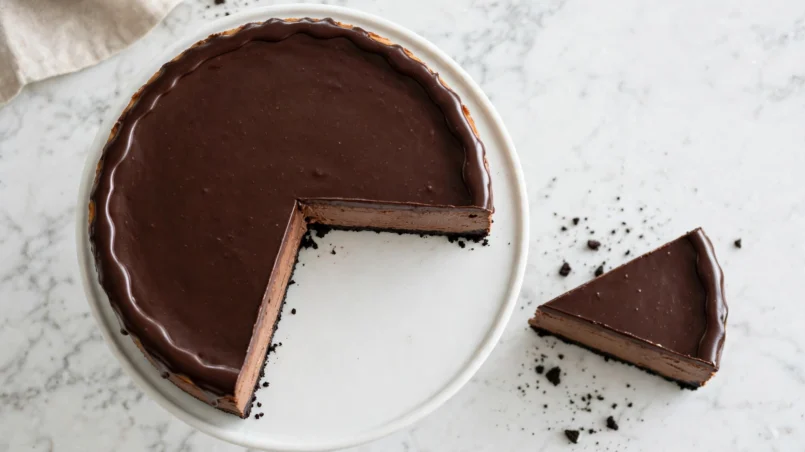
There is a dessert I order in every bistro I visit, and it is always the same one: the chocolate cheesecake. Not the cake, not the mousse — the cheesecake, the dense, dark slice that arrives cold on a white plate with a fork that sinks into it like it is cutting through something expensive. For years I assumed that slice came from a professional kitchen with equipment I did not own, because every cheesecake recipe I read started with the same intimidating words: water bath. Wrap the pan in foil, lower it into a roasting tray, pour in boiling water, pray nothing leaks. I tried it once. Water got in. The crust went soggy, the top still cracked, and I decided cheesecake was a bistro dessert, not a home one. Then I learned the secret this chocolate cheesecake recipe is built on: a cheesecake is a custard, not a cake — and a custard does not need a bath. It needs gentle heat and patience. Bake it hot briefly, then low and slow, and the top never cracks and no water ever gets near the pan. This is the classic baked chocolate cheesecake I make at home now, with an Oreo crust, a silky chocolate filling, and an overnight chill that does the last of the work while I sleep. No water bath, no drama, no cracks — and a slice that tastes like the bistro version, made in my own kitchen.
If you have only ever bought cheesecake, this recipe will surprise you twice. First, by how straightforward it is — if you can beat cream cheese until smooth and pour batter into a pan, you can make this. Second, by how much better a homemade cheesecake tastes than the shop kind, because the filling is still soft and creamy instead of the firm, rubbery wedge you get from a cheesecake that has sat in a display case for a week. It is the same melted chocolate you already know from our chocolate ganache recipe — folded into a cream cheese custard instead of poured over a cake — and it is finished with that very same ganache on top, so the whole dessert is chocolate from the crust to the last bite. And once you have made it once, you will understand why this is the recipe people ask for at every birthday and holiday table.
Table of Contents
- Why This Recipe Works
- Ingredients
- How to Make Chocolate Cheesecake
- The No-Crack Guide
- Pro Tips and Troubleshooting
- Variations
- How to Serve and Store
- Frequently Asked Questions
- Nutrition
- More Recipes You Will Love
Why This Recipe Works
A cheesecake is a baked custard — cream cheese and eggs, set by gentle heat — and everything in this recipe exists to protect that custard. Here is why this version works, every single time:
- The two-stage bake replaces the water bath. Instead of lowering the pan into boiling water, the cheesecake bakes for 15 minutes at 350°F to set the edges, and then — without opening the oven door — the temperature drops to 200°F for 50 minutes. The hot stage gives the filling structure; the low stage cooks the centre gently, the way a water bath would, without a drop of water anywhere near the pan. No foil wrapping, no roasting tray, no leaks, no soggy crust. This is the whole trick, and it is the reason this recipe is calm instead of stressful.
- Full-fat cream cheese blocks only. The filling is built on 32 oz of full-fat block cream cheese — four blocks, at room temperature. Light cream cheese, whipped cream cheese and tub cream cheese all contain more water and less fat, and they set loose and soft instead of dense and sliceable. The blocks are the structure of the cheesecake; everything else is flavour. Use the blocks, and let them come fully to room temperature before you start, so they beat smooth instead of lumpy.
- Low speed after the eggs go in keeps air out. Air is what cracks a cheesecake. Beat the cream cheese and sugar on medium speed until smooth, but the moment the eggs go in, drop to low speed and add them one at a time, mixing only until each one disappears. Over-beating whips air into the filling, and that air expands in the oven, puffs the cheesecake up — and then collapses as it cools, cracking the top on the way down. Gentle mixing is not a nicety here; it is the technique.
- Flour and cocoa stabilise the custard. Three tablespoons of flour and a third of a cup of cocoa powder do quiet structural work: they help the filling set firmly and slice cleanly, and they keep the custard from weeping. The cocoa is also the flavour — it deepens the chocolate beyond what the melted chocolate chips alone can do — and a teaspoon of instant espresso powder makes the chocolate taste more intensely like itself without making the cheesecake taste like coffee.
- The slow cool-down prevents the sudden contraction that cracks and sinks it. When the bake is done, the oven switches off and the cheesecake cools inside it with the door ajar for about 30 minutes. A cheesecake pulled straight from a hot oven into a cool kitchen contracts fast, and that fast contraction is what cracks the top and sinks the centre. The slow cool-down lets it settle gently, and the overnight chill in the fridge finishes the job — the custard firms up completely, and the slice comes out clean.
- The jiggle test is the doneness guard. You do not need a thermometer and you do not need to guess. At the end of the bake, gently shake the pan: the edges should be set and the centre — about a 3-inch circle — should wobble like jelly. That wobble is correct. It firms up as it cools and chills, and it is the difference between a creamy cheesecake and a dry, over-baked one. If the whole surface ripples, give it another 10 minutes at 200°F and check again.
None of this needs special equipment beyond one pan: an 8-inch springform pan, which is the pan cheesecake was invented for, because its sides release once the cake is fully chilled. A food processor helps for the crust, a stand mixer or hand mixer for the filling — and the fridge does the last, longest part of the work overnight.
Ingredients
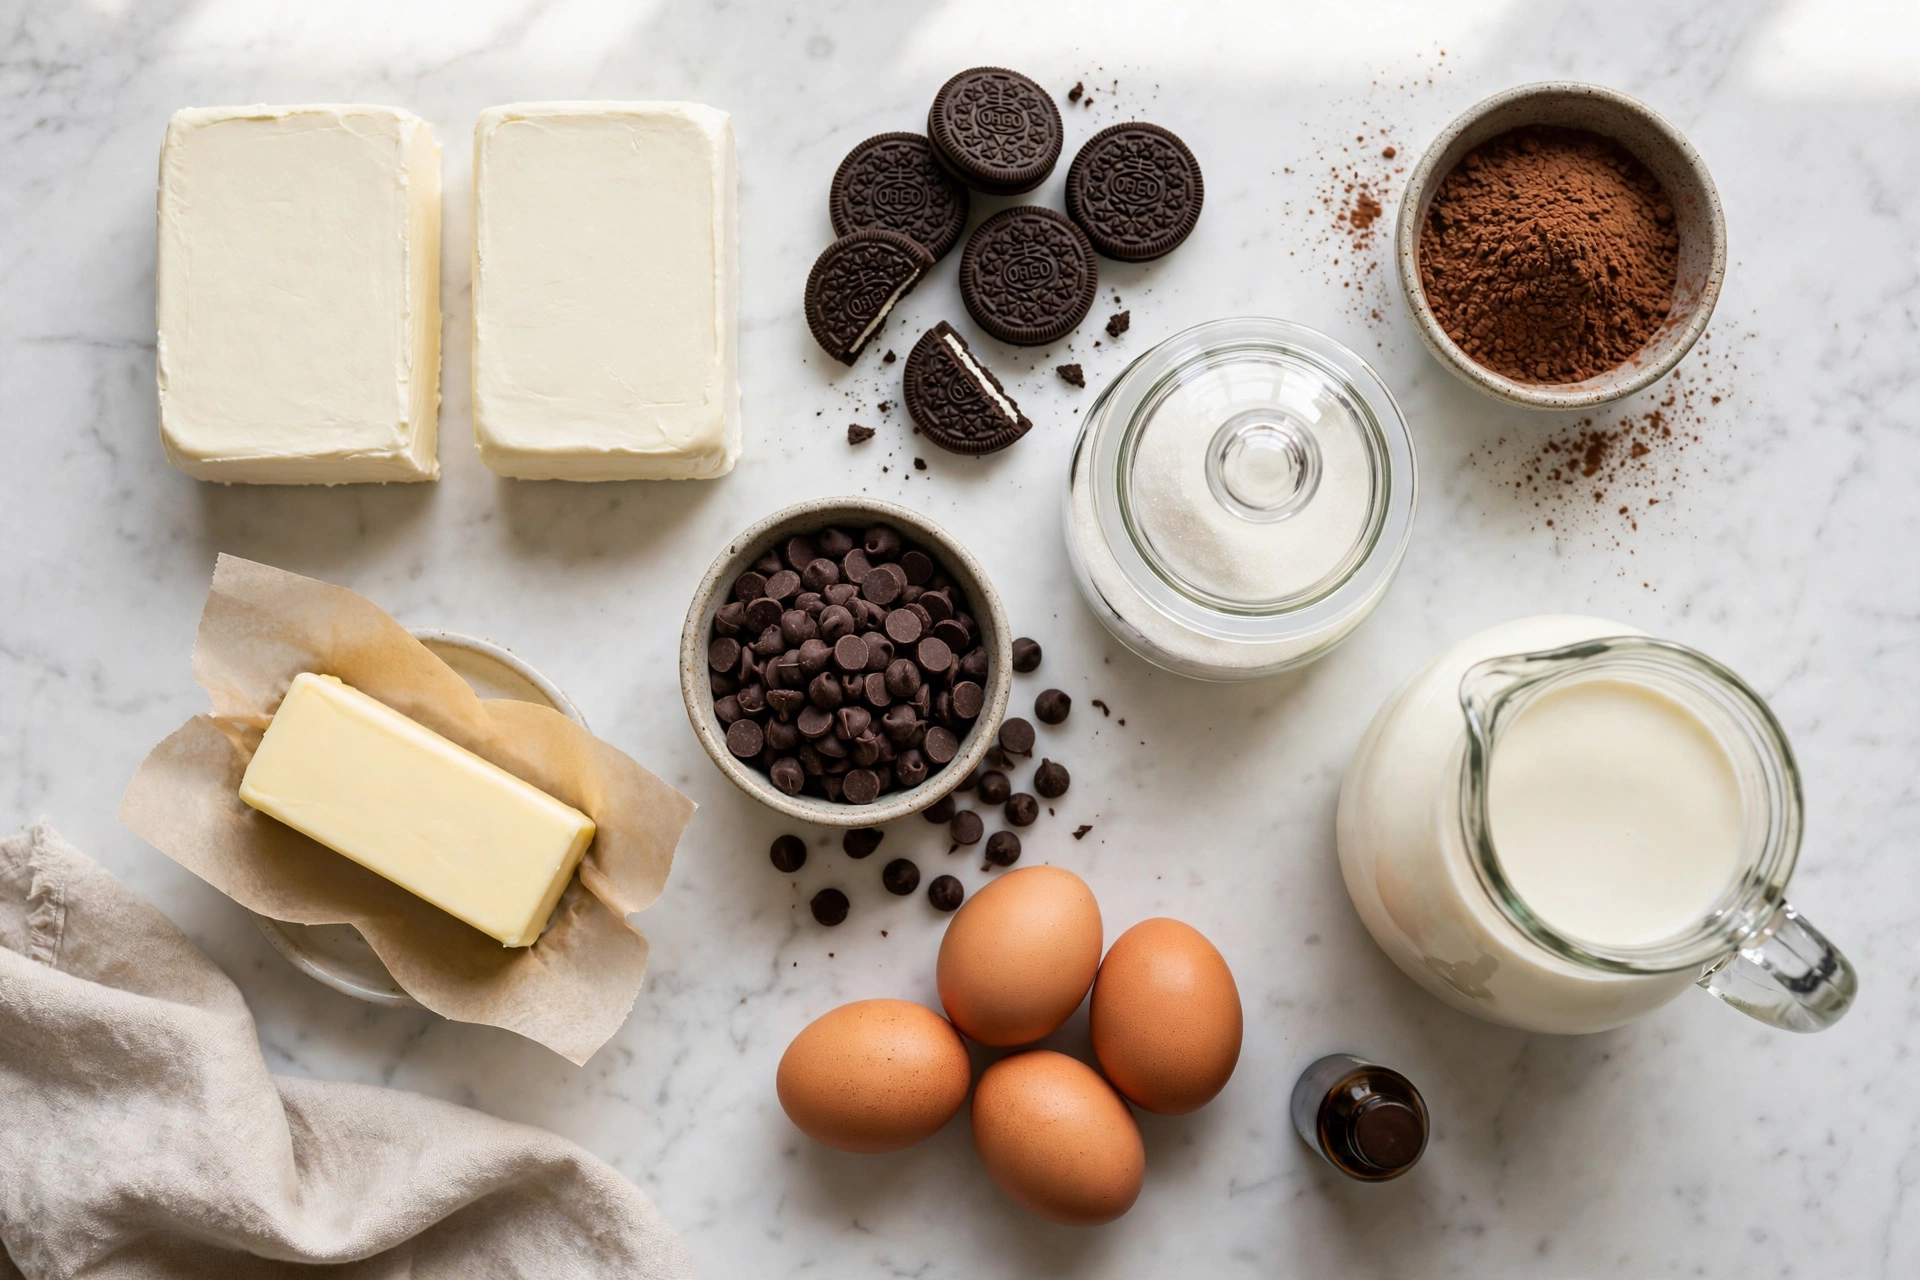
Thirteen ingredients in total — eleven for the cheesecake itself and two more for the optional ganache topping. Read the cream-cheese warning before you shop: it must be full-fat cream cheese in BLOCK form, at room temperature — NOT light, NOT whipped, NOT tub cream cheese, which will set loose and never slice cleanly. And the eggs and cream cheese must be at room temperature before you start, or the filling will be lumpy no matter how long you beat it. Those two choices decide the whole cheesecake.
For the Oreo Crust
- 20 Oreo cookies (about 2 cups crumbs) — the whole cookie, filling and all, crushed fine. The filling in the cookies melts into the crumbs and helps the crust hold together, so do not scrape it out. Any chocolate sandwich cookie works if you cannot find Oreos.
- 4 tablespoons (57 g / 2 oz) unsalted butter, melted — the glue that binds the crumbs into a firm crust. Unsalted, so you control the salt yourself. Melt it and let it cool for a minute before mixing, so it does not melt the cookie filling into a paste.
For the Chocolate Filling
- 32 oz (907 g / 4 blocks) full-fat cream cheese, at room temperature — the whole structure of the cheesecake. Full-fat blocks only, and genuinely at room temperature: take them out of the fridge at least an hour before you start, or the filling will be lumpy.
- 1 cup (200 g / 7 oz) granulated sugar — sweetens the filling and helps it set smooth. Weigh it if you can — a cup of sugar scooped from the bag can vary by 20 g, and the balance of sweet to chocolate matters here.
- 3 tablespoons (24 g) all-purpose flour — the quiet stabiliser. It helps the custard set firmly and slice cleanly, and it keeps the filling from weeping as it chills. Do not skip it; it is doing structural work.
- 1/3 cup (29 g) unsweetened cocoa powder — the deep chocolate flavour. Unsweetened natural cocoa, not drinking chocolate, which is sweetened and will make the filling too sweet. Dutch-processed cocoa works too and gives a darker colour.
- 1 teaspoon instant espresso powder — not for coffee flavour, but because coffee makes chocolate taste more intensely like chocolate. You will not taste coffee in the finished cheesecake; you will taste more chocolate.
- 1 teaspoon pure vanilla extract — rounds out the chocolate and the cream cheese. Pure extract, not imitation, if you have it — the flavour is rounder and it shows in a recipe this rich.
- 8 oz (227 g) semi-sweet chocolate chips, melted — the main chocolate in the filling. Melt them gently and let them cool slightly before they meet the cream cheese, or the heat will melt the cheese and make the filling grainy.
- 3/4 cup (180 ml) heavy cream — melted together with the chocolate chips, it keeps the chocolate fluid and silky as it folds into the filling. Full-fat heavy cream, at least 35 percent fat.
- 3 large eggs, at room temperature — the eggs are what set the custard. Room temperature, so they blend in smoothly instead of chilling the batter and making it lumpy. Add them one at a time, on low speed, and mix only until each one disappears.
For the Ganache Topping (Optional, Recommended)
- 4 oz (115 g) dark chocolate, finely chopped — the same chocolate from our chocolate ganache recipe, poured warm over the fully chilled cheesecake. Bar chocolate, not chips, so it melts smooth.
- 1/4 cup (60 ml) heavy cream — heated to just simmering and poured over the chopped chocolate, then rested five minutes and stirred smooth, exactly as in the ganache recipe.
For the pan: an 8-inch springform pan, lightly greased, with a round of parchment paper on the base if you like — it makes the first slice easier to lift. No foil wrapping, no roasting tray, no water bath. That is the whole point of this recipe.
How to Make Chocolate Cheesecake
Twenty-five minutes of prep, ten steps, and then the oven and the fridge do the rest. The only steps that need your full attention are the mixing and the two-stage bake — keep the speed low after the eggs go in, and do not open the oven door when the temperature drops. After that, the recipe practically makes itself, and the overnight chill is the longest and easiest step of all.
- Step 1 — Preheat and prepare the pan. Preheat the oven to 350°F / 175°C. Lightly grease an 8-inch springform pan and line the base with a round of parchment paper if you like. Set the pan on a baking sheet — it catches any butter that drips from the crust and makes the pan easier to move in and out of the oven.
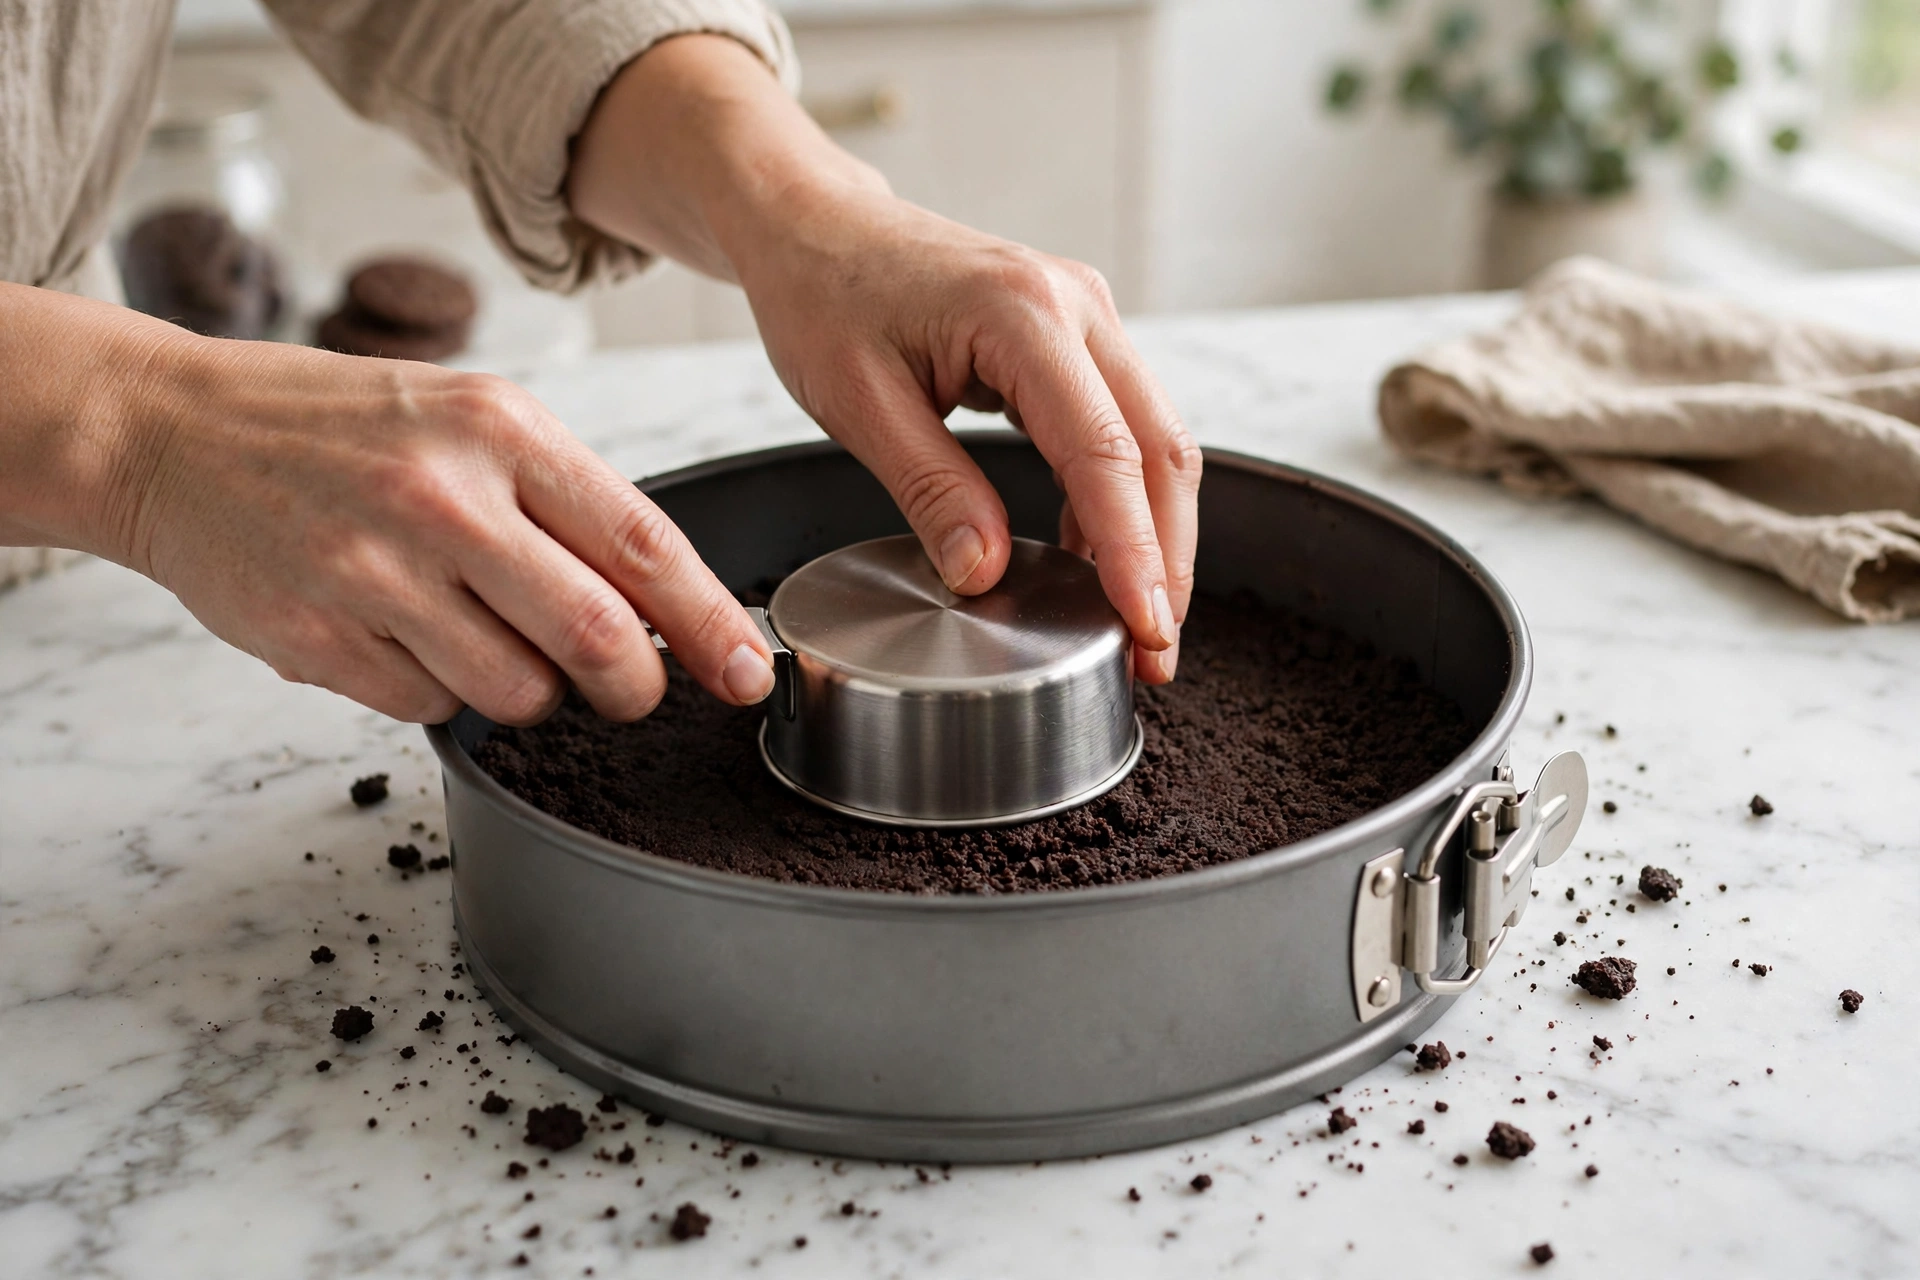
- Step 2 — Make the Oreo crust. Crush the 20 Oreo cookies into fine crumbs — a food processor does this in seconds, or put them in a sealed bag and crush them with a rolling pin. Mix the crumbs with the melted butter until every crumb is damp, then tip the mixture into the springform pan and press it firmly and evenly over the base with the flat bottom of a measuring cup. Bake the crust for 10 minutes at 350°F, then set it aside to cool while you make the filling. A baked crust is a firm crust — an unbaked one goes soggy under the filling.
- Step 3 — Melt the chocolate with the cream. Put the 8 oz of chocolate chips in a heatproof bowl with the 3/4 cup of heavy cream. Microwave in 30-second bursts, stirring between each one, until the chocolate is melted and the mixture is smooth — or melt them together over a pan of gently simmering water. Set the bowl aside to cool for 5 minutes. It should be warm, not hot, when it meets the cream cheese.
- Step 4 — Beat the cream cheese and sugar until smooth. In a large bowl, beat the room-temperature cream cheese and the sugar on medium speed until completely smooth and creamy, about 2 to 3 minutes. Scrape down the sides and the bottom of the bowl halfway through — cream cheese hides in lumps at the bottom, and a lump now is a lump in the finished cheesecake. This is the last time you will use medium speed.
- Step 5 — Add the flour, cocoa, espresso and vanilla. Add the flour, cocoa powder, instant espresso powder and vanilla extract, and beat on low speed just until combined. Scrape the bowl down again. The batter will be thick and dark, and it should look completely smooth — if you can still see streaks of cream cheese, keep beating on low for another 30 seconds.
- Step 6 — Add the melted chocolate mixture. Pour in the warm chocolate and cream mixture and beat on low speed just until it is fully incorporated and the batter is one even dark colour. Do not over-beat: the chocolate is already melted, and all you need is an even mix. If the chocolate was too hot, the batter will look thin and glossy — let it sit for a few minutes and it will thicken as it cools.
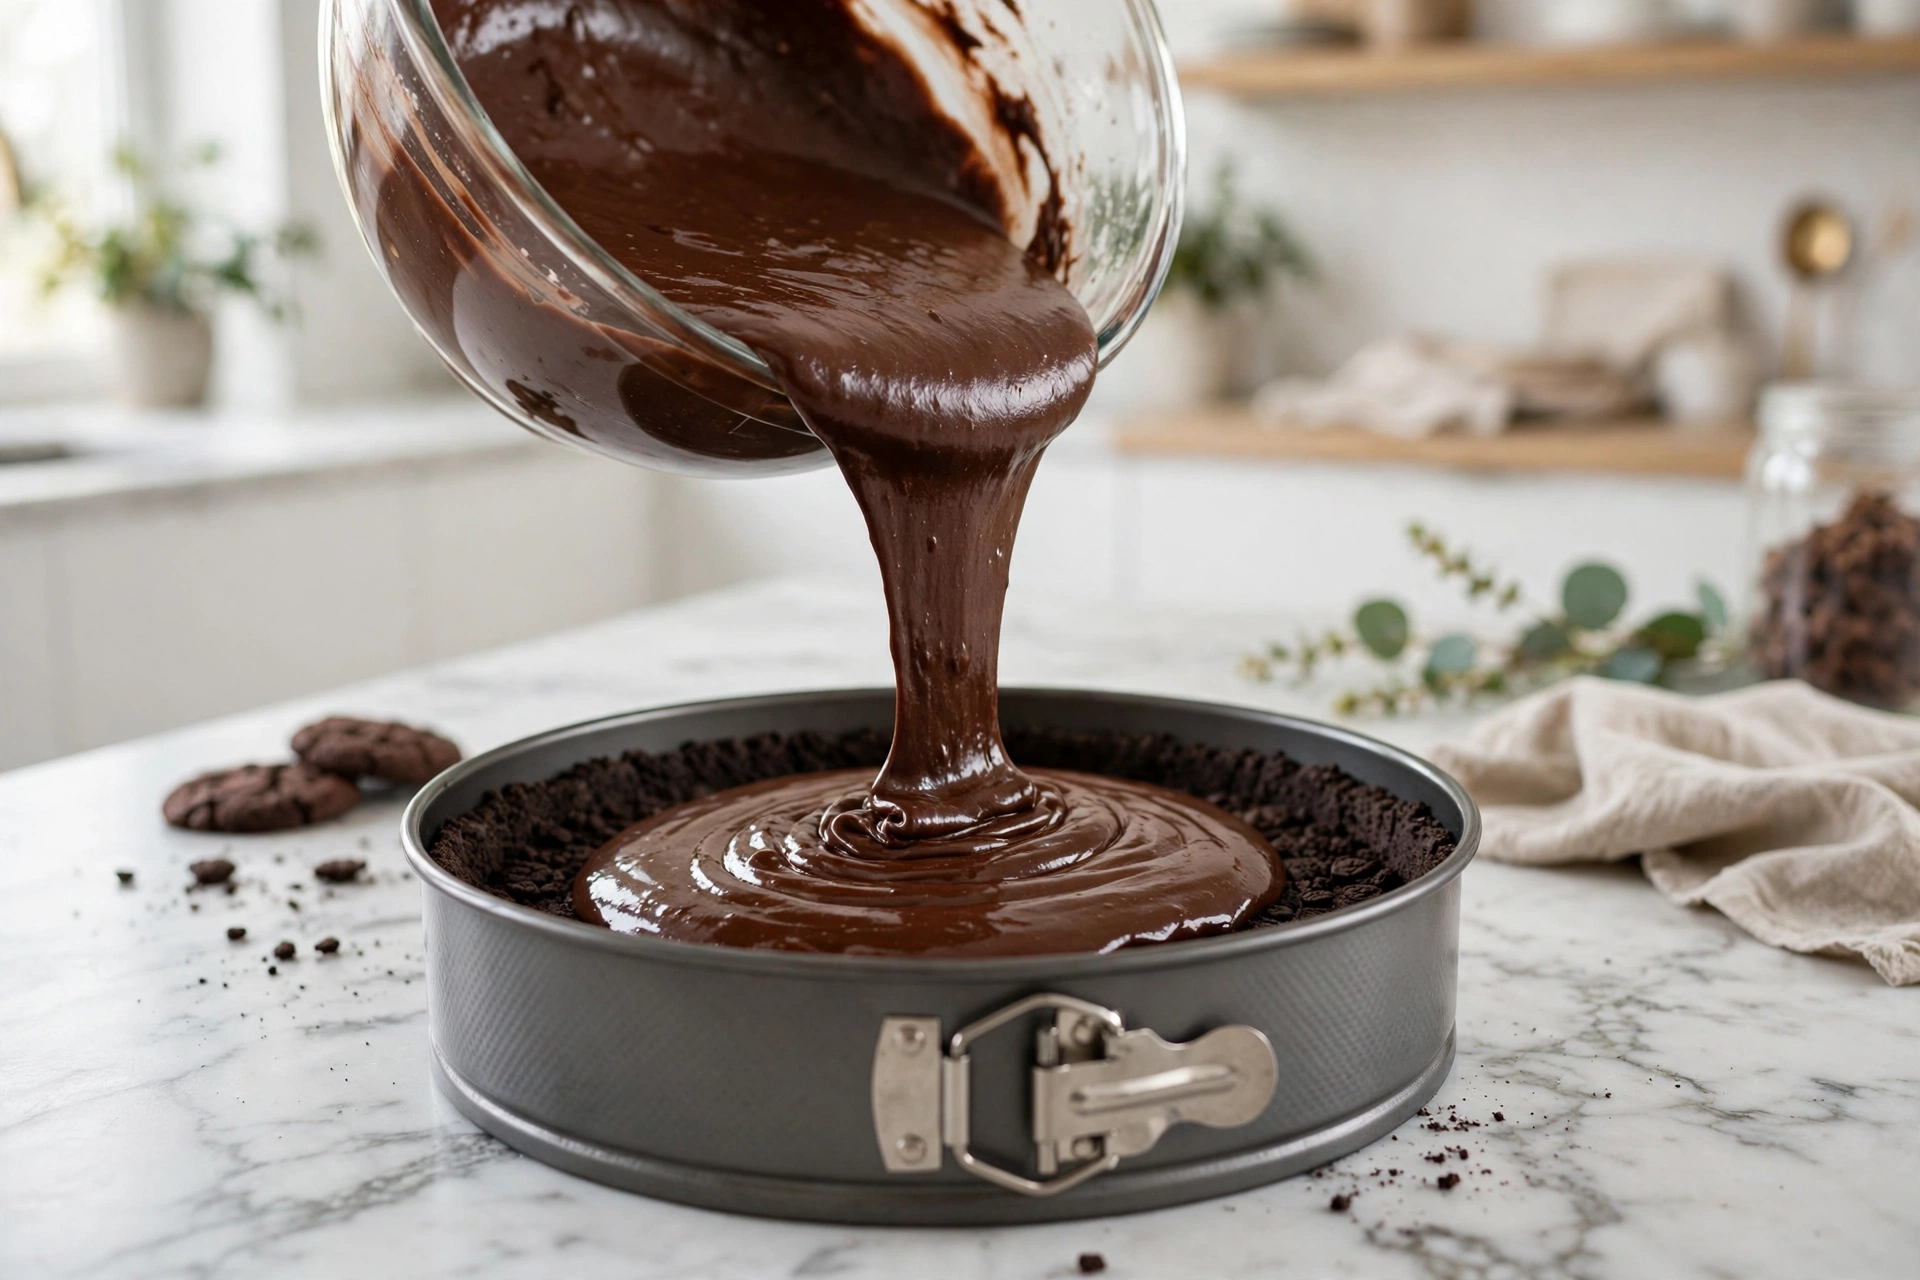
- Step 7 — Add the eggs, one at a time, on low speed. Add the eggs one at a time, beating on LOW speed just until each egg disappears before adding the next. This is the most important step in the whole recipe: low speed keeps air out of the filling, and air is what cracks the top. Do not rush it, and do not turn the speed up to finish faster. When the third egg is in, give the batter one final scrape and one last slow mix, and stop.
- Step 8 — Pour and bake hot for 15 minutes. Pour the filling over the cooled crust and smooth the top with a spatula. Tap the pan gently on the counter once or twice to pop any large air bubbles. Put the pan in the oven — on the baking sheet — and bake at 350°F for 15 minutes. The edges will begin to set and the top will look slightly puffed at the rim. Do not open the door to check; look through the glass.
- Step 9 — Drop to 200°F and bake for 50 minutes. WITHOUT opening the oven door, reduce the temperature to 200°F / 95°C and bake for another 50 minutes. The cheesecake will finish cooking gently at this low heat, the way it would in a water bath, and the top will stay smooth. At the end of the 50 minutes, gently shake the pan: the edges should be set and the centre — about a 3-inch circle — should wobble like jelly. That wobble is correct. If the whole surface ripples, give it another 10 minutes at 200°F and check again.
- Step 10 — Cool slowly, then chill overnight. Switch the oven OFF and leave the cheesecake inside with the door ajar for about 30 minutes — prop it open with a wooden spoon. Then take the pan out, let it cool to room temperature on the counter, cover it loosely, and refrigerate overnight, or for at least 4 to 6 hours. Do NOT release the springform sides until the cheesecake is fully chilled. Run a thin knife around the edge first, then release the sides slowly. If you made the ganache topping, pour it warm over the fully chilled cheesecake and chill for 30 minutes more to set.
The Two-Stage Bake
The two-stage bake is the whole method, and it is worth seeing as a table, because the temperatures and the rule about the door are the difference between a smooth top and a cracked one:
| Stage | Temperature | Time | What Happens |
|---|---|---|---|
| Crust bake | 350°F / 175°C | 10 minutes | The crust sets firm and crisp, so it stays solid under the filling |
| Stage 1 — hot | 350°F / 175°C | 15 minutes | The edges of the filling set and the cheesecake gains structure |
| Stage 2 — low | 200°F / 95°C | 50 minutes | The centre cooks gently, like a water bath, without cracking |
| Cool-down | Oven off, door ajar | 30 minutes | The cheesecake settles slowly instead of contracting fast |
| Chill | Fridge | Overnight (minimum 4–6 hours) | The custard firms up completely and slices clean |
One rule runs through the whole table: do not open the oven door between stage 1 and stage 2. Opening the door drops the temperature suddenly, and a sudden temperature drop is exactly what cracks a cheesecake. Turn the dial down through the glass, and let the oven do the work.
The No-Crack Guide
A cracked cheesecake still tastes wonderful, but nobody wants the crack, and it is the fear of the crack that keeps most people from baking cheesecake at all. The good news is that cracks have only three causes, and this recipe is built to prevent all three of them:
- Cause 1 — the oven was too hot. A cheesecake baked at a high temperature all the way through overcooks the outside before the centre is done, and the top dries out and splits. The two-stage bake is the fix: 15 minutes hot to set the edges, then 50 minutes at 200°F, so the centre cooks gently. If your oven runs hot, an oven thermometer is worth the few dollars — a dial that says 350°F and means 375°F will crack a cheesecake every time.
- Cause 2 — the filling was over-beaten. Beating on high speed, or beating for a long time after the eggs go in, whips air into the filling. That air expands in the oven and puffs the cheesecake up, and then it collapses as it cools — and the top cracks on the way down. The fix is in step 7: low speed, eggs one at a time, mix only until each one disappears, and stop. The batter should look dense and glossy, never light and fluffy.
- Cause 3 — it cooled too fast. A cheesecake pulled straight from a hot oven into a cool kitchen contracts suddenly, and the top cracks and the centre sinks. The fix is in step 10: switch the oven off, leave the cheesecake inside with the door ajar for 30 minutes, then cool it to room temperature before it goes into the fridge. Never put a warm cheesecake in the fridge, and never release the springform sides until it is fully chilled.
If it cracks anyway: do not panic, and do not throw it away. A crack is appearance only — the cheesecake tastes exactly the same. Pour the warm ganache topping over the fully chilled cheesecake and the crack disappears under a glossy dark surface. That is what the ganache topping is for, and it is why the recipe recommends it: it is both the prettiest finish and the best insurance a cheesecake has. A dollop of whipped cream and a few chocolate curls hide anything else.
Pro Tips and Troubleshooting
Most cheesecake problems have one of six causes, and all six are easy to fix — or to avoid entirely. Here they are, with the fix for each:
- Cracked top: the oven was too hot, the filling was over-beaten, or it cooled too fast. Check the three causes in the no-crack guide above, and hide the crack under the ganache topping — it is appearance only and the cheesecake tastes the same. Next time, verify your oven temperature with a thermometer and keep the speed low after the eggs go in.
- Sunken centre: under-baked, or cooled too fast. Use the jiggle test at the end of the bake: if the whole surface ripples instead of just the centre wobbling, give it another 10 minutes at 200°F. And always cool it in the oven with the door ajar before it comes out — a sudden temperature drop sinks the centre as surely as under-baking does.
- Lumpy filling: cold cream cheese, or eggs added too fast. The cream cheese must be genuinely at room temperature — take it out of the fridge at least an hour before you start — and the eggs must be at room temperature too. Beat the cream cheese and sugar until completely smooth before anything else goes in, and scrape the bowl down twice. A lump in the bowl is a lump in the finished cheesecake.
- Soggy crust: the crust was under-baked, or the butter pooled. Press the crumbs firmly and evenly with the flat bottom of a measuring cup, and bake the crust for the full 10 minutes — a baked crust is a firm crust. If the butter pools at the edges, you pressed too loosely in the middle; press again and bake it a minute longer.
- Grainy filling: the chocolate was too hot when it hit the cream cheese, or the chocolate seized from water. Let the melted chocolate and cream cool for 5 minutes before adding it, so it is warm, not hot. And keep water out of the chocolate entirely — even a few drops will make it seize into a grainy paste. If it seizes, stir in a tablespoon of warm cream and keep stirring until it smooths out.
- Will not slice clean: not chilled long enough. The overnight chill is not optional — it is what makes the slice clean. If you cut into a cheesecake after only 2 hours, the centre will be soft and the knife will drag. Chill it overnight, use a long thin knife, dip it in hot water and wipe it dry between cuts, and each slice will come out with a clean, sharp edge.
Two more tips worth knowing: weigh the cream cheese and the sugar — grams are where the balance stops slipping, and a kitchen scale is the cheapest insurance this recipe has. And make the cheesecake the day before you need it. It is at its best on day two, after a full night in the fridge, and there is nothing left to do on the day except pour the ganache, slice it with a cold knife, and serve it.
Variations
Once the base recipe is in your hands, it is easy to make it your own. Every variation below uses the same method — crust, filling, two-stage bake, slow cool, overnight chill — with one or two changes:
- No-bake version: a different dessert, not the base — but if you have no oven, it works. Use the same crust, pressed into the pan and chilled instead of baked. For the filling, beat the cream cheese, sugar, cocoa and vanilla, fold in the melted chocolate and cream, then fold in 300 ml of whipped cream and 2 teaspoons of gelatine dissolved in 3 tablespoons of hot water. Chill overnight to set. It is lighter and mousse-like, and it will never have the dense, sliceable texture of the baked version — flag it as the no-bake cousin, not a substitute.
- White-chocolate cheesecake: the same method, with white chocolate instead of semi-sweet. Replace the 8 oz of semi-sweet chips with 8 oz of white chocolate, reduce the sugar to 3/4 cup — white chocolate is sweeter — and leave out the cocoa powder, or the filling turns grey. The result is pale, creamy and very sweet, and it takes a berry topping beautifully.
- Mocha cheesecake: double the instant espresso powder to 2 teaspoons, dissolved in the warm chocolate and cream mixture before it goes into the filling. The coffee flavour comes forward properly in this version — it is the same trick bakers use in chocolate cake, taken one step further — and a dusting of cocoa on top finishes it.
- Mini cheesecakes: line a muffin tin with paper cases, press a spoonful of crust into each one, and divide the filling between the cases. Bake for about 20 minutes at 325°F — no two-stage bake needed at this size — and cool them the same slow way, in the switched-off oven with the door ajar. They chill in 3 to 4 hours instead of overnight, and they are the version to make for a party, because everyone gets their own.
- Topping bar: keep the cheesecake plain and let people finish their own slice. Set out the warm ganache, softly whipped cream, fresh raspberries and strawberries, chocolate curls and chopped toasted hazelnuts, and let each person build their slice. It is the easiest way to serve cheesecake to a crowd, and the plain slice is the one that shows off the filling best.
How to Serve and Store
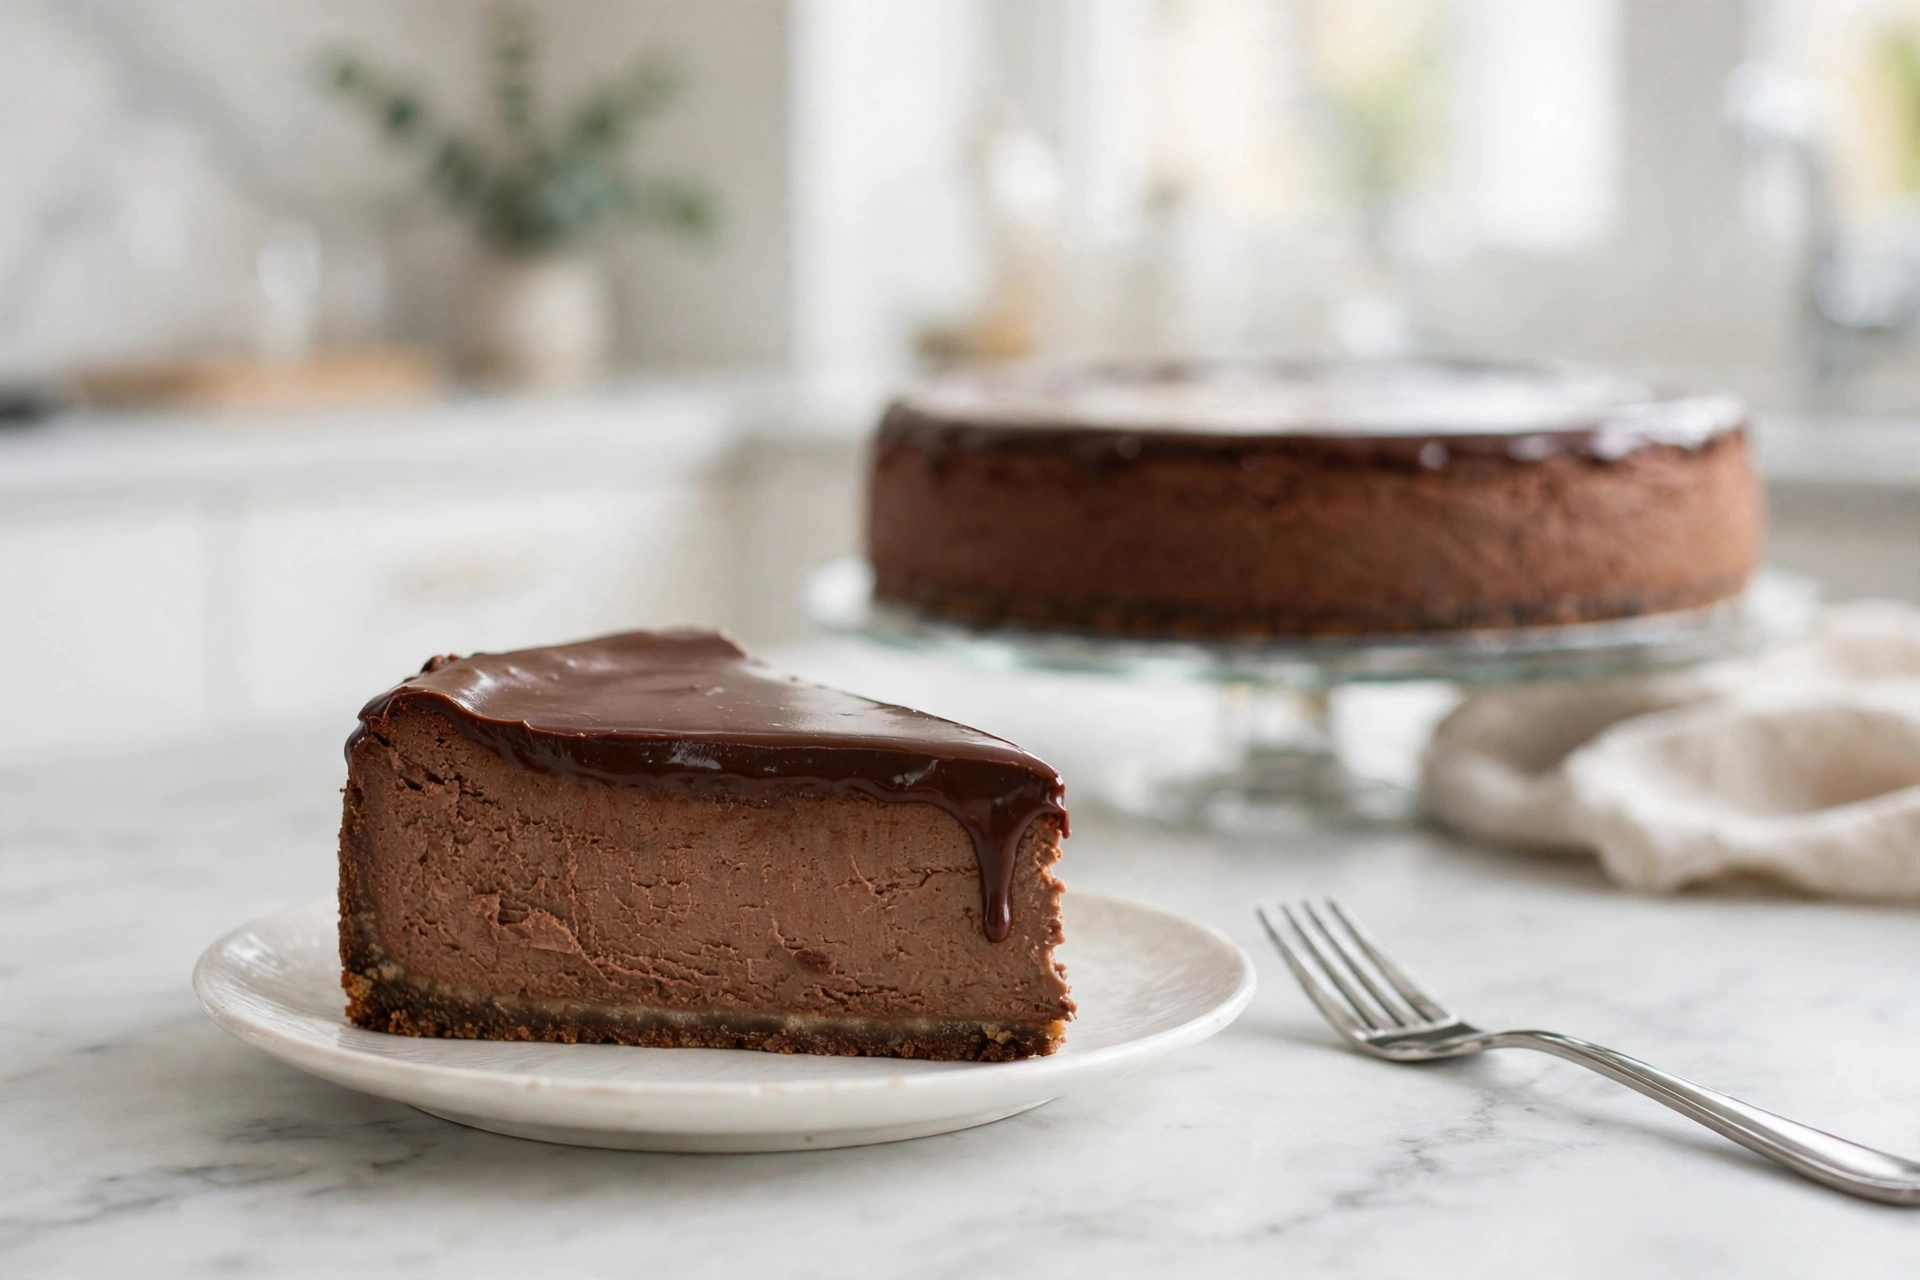
Serving: serve chilled, straight from the fridge. Use a long, thin knife: dip it in hot water, wipe it dry, and cut in one smooth motion — then wipe and repeat for every slice. A cold knife and a clean wipe between cuts are what keep the edges sharp and the layers visible. For another chocolate dessert on the same table, our chocolate mousse recipe is the no-bake, air-set opposite of this dense baked custard — and our chocolate pudding recipe is another classic custard dessert, spoonable instead of sliceable. If you want something lighter than a dense cheesecake, our chocolate cake recipe is the fluffy alternative on the site.
Refrigerator: the cheesecake keeps for up to 5 days in the fridge, covered — a cake dome, an upturned bowl, or cling film pressed loosely over the top so it does not touch the ganache. It is at its best on day two, after a full night in the fridge, and the flavour deepens slightly each day. Do not leave it uncovered: the fridge will dry out the surface and the cheesecake will pick up other flavours.
Freezer: cheesecake freezes beautifully, whole or in slices, for up to 2 months. Freeze slices on a tray first, then wrap each one tightly in cling film and foil and put them in a freezer bag. Thaw overnight in the fridge — never on the counter, or the condensation will make the ganache sticky. Freeze it without the ganache topping if you can, and pour the ganache fresh after thawing.
Make-ahead: this is a make-ahead recipe by nature — it is best made a day ahead, and it holds for 5 days in the fridge. Make it on Saturday for a Sunday table, pour the ganache on Sunday morning, chill for 30 minutes to set, and slice it just before serving. There is nothing left to do on the day except the knife work.
Frequently Asked Questions
Do I need a water bath for chocolate cheesecake?
No — the two-stage bake replaces it. Bake for 15 minutes at 350°F to set the edges, then drop the temperature to 200°F for 50 minutes without opening the door, and the centre cooks gently, the way it would in a water bath. No foil wrapping, no roasting tray, no boiling water, and no water ever gets near the pan. The water bath exists to give the cheesecake gentle heat; the low second stage does the same job.
Why did my cheesecake crack?
One of three causes: the oven was too hot, the filling was over-beaten, or it cooled too fast. Check the no-crack guide above — verify your oven temperature with a thermometer, keep the mixer on low speed after the eggs go in, and always cool the cheesecake in the switched-off oven with the door ajar before it comes out. A crack is appearance only, and the ganache topping hides it completely.
How do I know when my cheesecake is done?
Use the jiggle test. At the end of the bake, gently shake the pan: the edges should be set and the centre — about a 3-inch circle — should wobble like jelly. That wobble is correct, and it firms up as the cheesecake cools and chills. If the whole surface ripples, give it another 10 minutes at 200°F and check again. A cheesecake that looks fully set in the oven is already over-baked.
Why must it chill overnight?
Because a cheesecake is a custard, and the custard is not set until it is cold. The overnight chill firms the filling completely, deepens the chocolate flavour, and is what makes the slice clean — a cheesecake cut after only 2 hours will be soft in the centre and the knife will drag. Four to 6 hours is the minimum; overnight is better, and it is why this recipe is best made a day ahead.
Can I use low-fat cream cheese?
Not recommended. Light cream cheese, whipped cream cheese and tub cream cheese all contain more water and less fat than the full-fat blocks, and they set loose and soft instead of dense and sliceable. The cheesecake will taste fine, but it will never hold a clean slice. Use full-fat block cream cheese, at room temperature, and the recipe works as written.
Can I make chocolate cheesecake ahead of time?
Yes — this is a make-ahead recipe by nature, and it is at its best on day two. Make it a day ahead, keep it covered in the fridge for up to 5 days, and pour the ganache topping on the day you serve it. It also freezes well, whole or in slices, for up to 2 months — thaw overnight in the fridge and pour the ganache fresh after thawing.
Can I use a 9-inch pan instead of an 8-inch pan?
Yes. The cheesecake will be shorter and wider, and it will bake a little faster — shave about 5 minutes off the low second stage and check the jiggle a few minutes early. The crust will be thinner, so press it just as firmly, and use the same amounts: the recipe makes enough filling for either pan, and the 9-inch version serves the same 12 slices, cut slightly thinner.
Nutrition (Per Serving, Approximate)
Calories: 450 | Carbohydrates: 38g | Protein: 7g | Fat: 30g | Sugar: 28g
Nutrition values are estimated for 1 of 12 slices, including the ganache topping, and may vary based on exact ingredients used.
More Recipes You Will Love
| Recipe | Category |
|---|---|
| Chocolate Ganache Recipe | Chocolate Treats and Candy |
| Chocolate Truffles Recipe | Chocolate Treats and Candy |
| Chocolate Fudge Recipe | Chocolate Treats and Candy |
| Chocolate Mousse Recipe | Chocolate Treats and Candy |
Chocolate Cheesecake Recipe
Ingredients
Method
- Preheat the oven to 350°F / 175°C. Lightly grease an 8-inch springform pan and line the base with parchment paper. Set the pan on a baking sheet.
- Crush the 20 Oreo cookies into fine crumbs, mix with the melted butter until every crumb is damp, press firmly and evenly over the base with the flat bottom of a measuring cup, and bake 10 minutes at 350°F. Set aside to cool.
- Put the 8 oz of chocolate chips in a heatproof bowl with the 3/4 cup of heavy cream. Microwave in 30-second bursts, stirring between each one, until melted and smooth. Set aside to cool for 5 minutes.
- Beat the room-temperature cream cheese and sugar on medium speed until completely smooth and creamy, about 2 to 3 minutes, scraping down the sides and bottom halfway through.
- Add the flour, cocoa powder, instant espresso powder and vanilla extract and beat on low speed just until combined. Scrape the bowl down again.
- Pour in the warm chocolate and cream mixture and beat on low speed just until fully incorporated and one even dark colour.
- Add the eggs one at a time, beating on LOW speed just until each egg disappears before adding the next. Scrape the bowl and give one last slow mix.
- Pour the filling over the cooled crust, smooth the top, tap the pan gently on the counter to pop air bubbles, and bake at 350°F for 15 minutes.
- WITHOUT opening the oven door, reduce the temperature to 200°F / 95°C and bake for another 50 minutes. Gently shake the pan: the edges should be set and the centre should wobble like jelly.
- Switch the oven OFF and leave the cheesecake inside with the door ajar for about 30 minutes. Cool to room temperature, cover loosely, and refrigerate overnight (minimum 4 to 6 hours). Run a thin knife around the edge, then release the springform sides. Pour warm ganache over the chilled cheesecake if using, and chill 30 minutes to set.